
Sculptural Rainbow Soap Tutorial
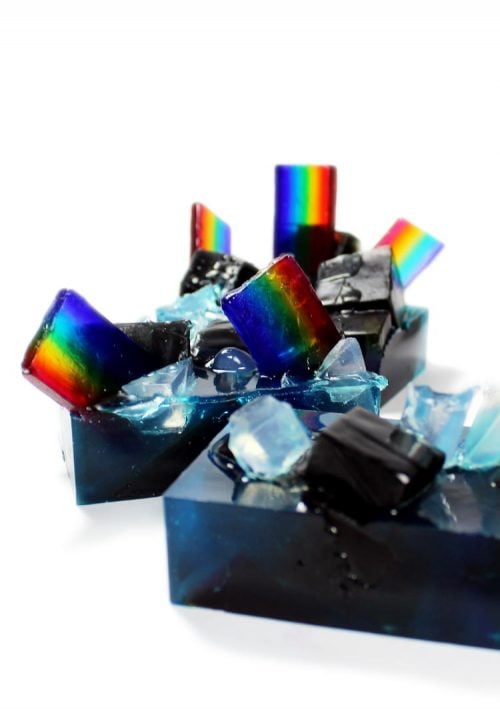
This sculptural rainbow soap tutorial will teach you how to make your own unique and fun homemade rainbow soaps! No two are alike, but instead are like little works of art! And that, of course, is what makes these so much fun! There’s no right or wrong way to make them!
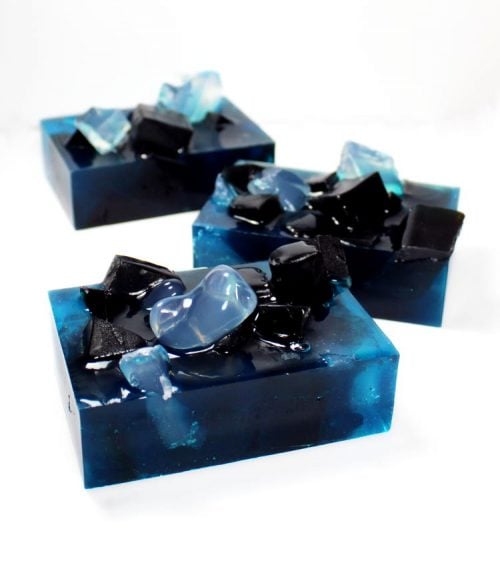
At the same time you’re creating these fun rainbow soaps, you can also create homemade soaps that resemble pebbles in a stream! Scent these water inspired homemade soaps with a Cool Water type fragrance oil for a fun homemade gift idea for a boyfriend or significant other!
Here’s how to make yours!

Sculptural Rainbow Soap Tutorial
© Rebecca D. Dillon
Ingredients:
rainbow soap slices (rainbow soap tutorial here)
basic clear glycerin melt and pour soap base
stained glass ocean blue liquid soap color, or similar
black sparkle color bar
fragrance oil, of choice
Instructions:
Begin by making a bar of rainbow soap, then cut it into 12 rainbow slices. You can find my rainbow soap tutorial for making the rainbows on my DIY Rainbow Soap Favors post here.
You’ll also need a rectangle silicone mold. I specifically used this Ozera Silicone 6-Cavity Rectangle Soap Mold.
Once your soap slices are cut and ready arrange one to three rainbows in each of three of the mold cavities so the tops of the rainbows protrude out over the top of each mold cavity. (I used the rainbows leftover from making six of the rainbow soap favors.)
Now, using a digital scale, weigh out 11.4 oz. of the basic clear glycerin melt and pour soap base and cut into chunks.
Heat in the microwave in 30 second increments, stirring in between heatings, until the soap has melted. (Alternately you can also use a double boiler.) You don’t want your soap to boil so watch it carefully.
Cut one of the square sections of your black sparkle color bar in half and then stir it into the melted soap base until it has fully melted. (Alternately you can also use a black liquid soap colorant.)
If using a fragrance, add . 25 oz. of your fragrance oil of choice to the melted soap and stir. (Alternately you can also use .1 oz. – .15 oz. of an essential oil of your choice. I’m hung up on the blood orange essential oil that I’ve been using for some of my other recent projects, so that’s what I chose for this specific project.)
Now pour the black sparkle colored soap into your mold cavities containing the rainbows. I had a little extra also filled part of a fourth mold cavity. You’ll use this for the soap that resembles pebbles in a stream.
Spritz the tops of the soap you just poured with isopropyl alcohol to remove any air bubbles, then allow the soap to harden completely.

Once the soaps have solidified, unmold them.

Using a knife, cut the soap bars into chunks of various sizes.

Now place the regular black soap chunks and the black soap chunks with the rainbows randomly into two of the soap mold’s cavities. The rainbows should be sticking out above the top of the mold cavities wherever possible.
Now arrange any remaining black soap chunks arbitrarily into three of the mold’s cavities.
Melt about a half cup of the clear melt and pour soap base and scent as desired. Add several drops of the blue soap colorant to suit, then pour it into the soap mold around the soap chunks until each of the mold’s cavities are about 2/3 of the way full.
Spritz the top of the soap you just poured with isopropyl alcohol to remove any air bubbles then allow the soap you just poured to harden.
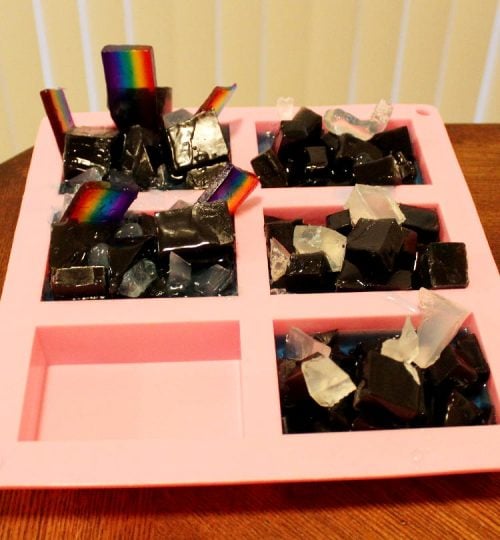
Once the soap has hardened, arbitrarily cut some of the clear melt and pour soap into chunks and arrange on top of the soap layer you just poured to suit. You can also add in additional black soap chunks to build up the soap up out of the mold more if desired.

Now melt and scent more of the melt and pour soap base. Add the blue soap color, then pour while hot over top of the soap chunks until you’ve filled the mold’s cavities entirely. Pouring the soap over the solid soap chunks will slightly melt the soap it’s being poured onto and round off some of the harsher edges.
Allow the soap to solidify, then unmold the soaps you’ve created.
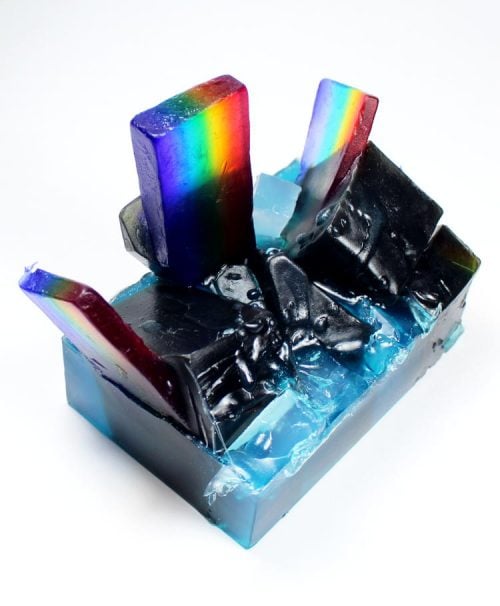
You should now have two fantastic sculptural rainbow soaps and three additional soap bars that resemble pebbles in a stream.

Wrap your soaps tightly in foodservice film or your packaging of choice, and they’re ready to be gifted or used!
If you are making my sculptural rainbow soaps to sell, you’ll need to label your soaps appropriately to meet state and federal laws. If you’re unsure about the rules and regulations regarding labeling cosmetics, I highly recommend the book, Soap and Cosmetic Labeling: How to Follow the Rules and Regs Explained in Plain English, by Marie Gale.
For more of my homemade soap recipes, be sure to follow my Simply Soapmaking board as well my DIY Bath and Body board on Pinterest. You can also find and follow me on Facebook, Twitter, Blog Lovin’, and Instagram.


2 Comments
Debbie Chialtas
February 13, 2017 at 5:39 pm
How cool and creative!! Love the free form style!
Rebecca D. Dillon
February 13, 2017 at 5:51 pm
Thank you!
Comments are closed.