
Homemade Chia & Charcoal Soap Recipe to Naturally Hydrate Maturing Skin (Even If It’s Acne Prone!)
This homemade chia & charcoal soap recipe is made with soothing and hydrating chia seed oil and naturally detoxifying activated charcoal. It’s an easy, natural way to hydrate maturing skin without any extra steps as part of your daily beauty regimen. Even if your skin is acne prone!

Formulating A Natural Charcoal Soap for Maturing & Acne Prone Skin
As I’ve aged – 42 this coming June! – my skin has gotten more particular. Dry and irritated skin has become a more common occurrence. Unfortunately, adult acne is also a thing. And it hates me. Especially when the hormones are going crazy or I’m overly stressed. My chia & charcoal soap recipe is my solution for keeping my skin happy.
I chose to use chia seed oil in this soap recipe as it is rich in essential fatty acids, powerful antioxidants and phytonutrients that are prized in anti-aging skin care products. I also included walnut oil in this soap formulation for it’s value in skin care – specifically its moisturizing and skin soothing properties.
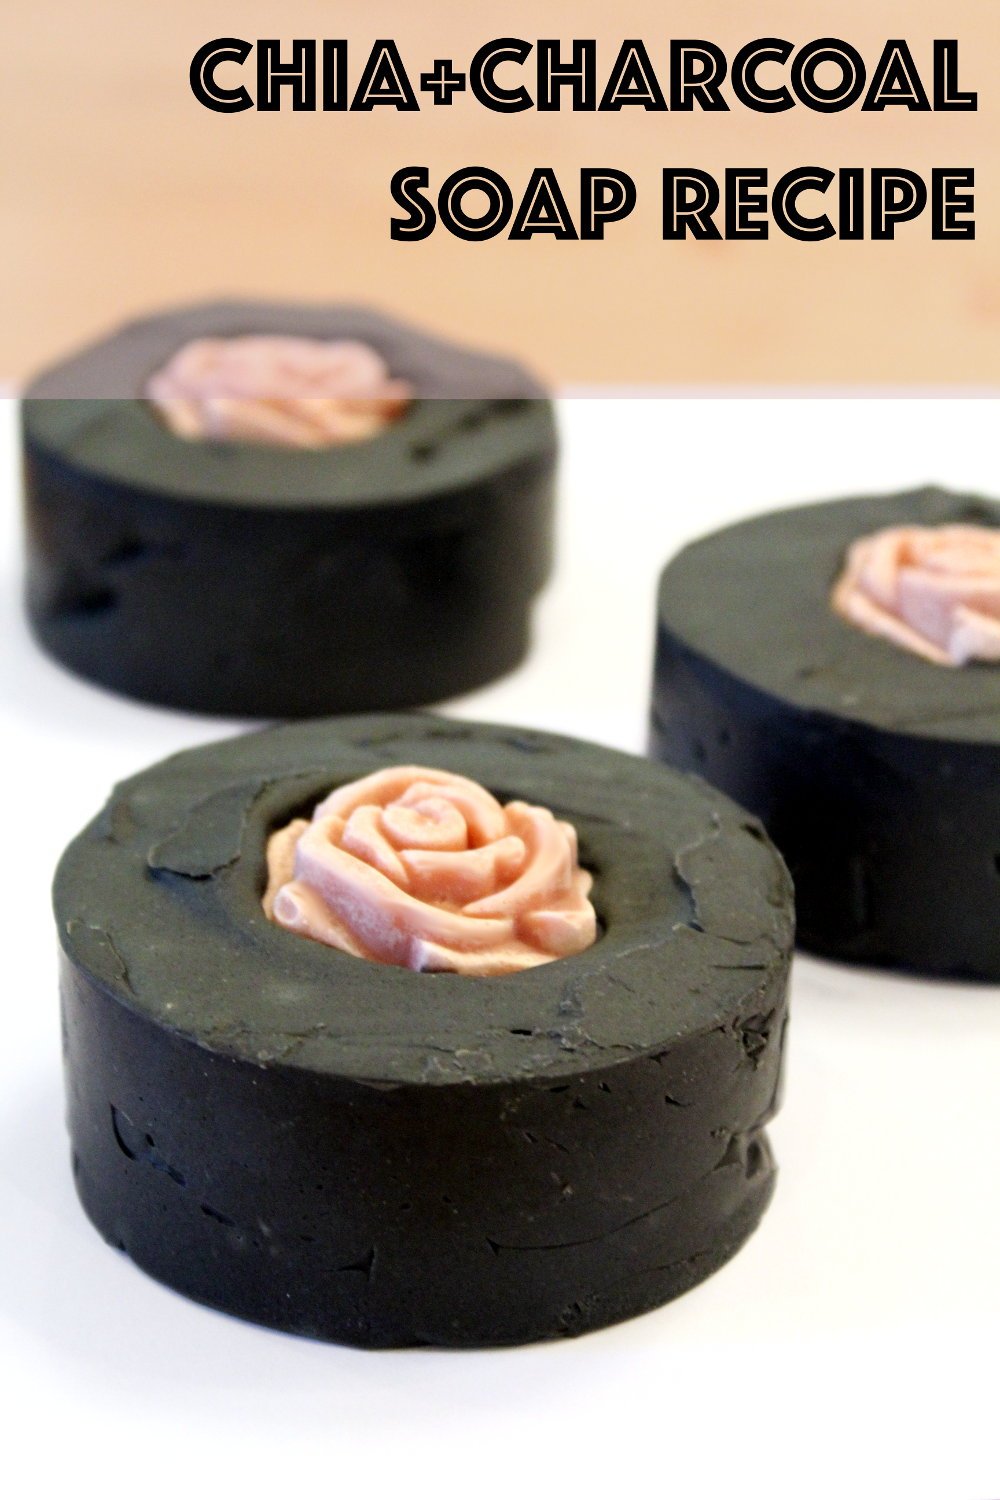
I then combined these ingredients with neem oil and activated charcoal to help fight and prevent acne. A little bit of Australian midnight black clay also plays a role and helps give this homemade soap a boost to it’s beautiful dark gray/black color that I accented with a pink rose.
As my chia & charcoal soap is palm free, I decided to give candelilla wax a place in this recipe for a harder bar. As I know I do have vegan readers, I chose to use this wax over beeswax. It was a little tricky to work with as it’s such a hard wax, but luckily this recipe turned out beautifully.
You’ll find that my chia & charcoal soap recipe yields a medium-hard bar with strong bubbles, but still a lower cleansing level. I bumped the superfat on this one up to 8% to make the bar a little more conditioning. I think this soap is great for those days leading up to and during a break out as a facial soap as well as during hot months when I’m sweating more and producing more oil and struggling with acne in those annoying places like under my chin, around my hairline and across my upper back.
Following is my chia & charcoal soap recipe. I hope you like it!

Natural Chia & Charcoal Soap Recipe
© Rebecca D. Dillon
Ingredients:
1.6 oz./45 grams (5%) castor oil
3.2 oz./90.7 grams (10%) extra virgin chia seed oil
.65 oz./18.1 grams (2%) candelilla wax
8 oz./226.8 grams (25%) refined coconut oil
3.2 oz./90.7 grams (10%) neem oil
13.75 oz./390 grams (43%) pomace olive oil
1.6 oz./45.3 grams (5%) walnut oil
9.75 oz./276.6 grams distilled water (30.5% of oil weight)
4.2 oz./120 grams lye/sodium hydroxide (8% superfat)
1 oz./28.3 grams sodium lactate (60% solution)
.55 oz./15.5 grams coconut activated charcoal (1 Tbs per pound)
1.1 oz./31.1 grams Australian midnight black clay (.5 Tbs per pound)
.05 oz./1.4 grams fine grain pink Himalayan salt (about 1/4 teaspoon)
up to 2 oz./56.7 grams fragrance oil, optional (1 oz. per pound)
Instructions:
I scented my chia & charcoal soap with a combination of two fragrance oils that were close to empty. I used .95 oz. of cardamom mocha fragrance oil with the last .4 oz. of my chocolate fragrance oil. It basically smells like yummy chocolates without being overpowering, but it was enough that it covered the smell of the neem oil.
I premade the pink roses for this soap using some of the leftover soap batter from my donut soap recipe here and a Wilton small rose silicone mold.
For the main soap bars, I used two Crafter’s Choice basic round soap molds. My chia & charcoal soap recipe yields about nine soap bars weighing just over 5 oz. each with the embeds.
As stated previously, working with the candelilla wax was a little challenging as I’d never worked with it before. Therefore I don’t recommend making my chia & charcoal soap recipe unless you have soapmaking experience under your belt. (If you’re looking to get started making cold process soap for the first time, I recommend you start with a beginner soap recipe.) Otherwise, you’ll follow your basic cold process soapmaking instructions to create this soap, but mix the lye/water and soapmaking fats at a higher temperature due to the wax.
Begin by measuring out the amount of water called for in the recipe into a heat safe container. Next, use a digital scale to weigh out the lye.
Slowly pour the lye into the water in a well ventilated area. Stir the lye until it has dissolved, then set the lye-water aside.
Next, weigh out the soapmaking fats – these are all of the carrier oils and the wax called for in my chia & charcoal soap recipe. I combined these in a stainless steel pot and heated them on the stove over medium heat.
But – this is where it goes a little sideways. I’d never used a wax this hard in soap before. So my oils started to bubble before my candelilla wax melted. When this happened I basically just kept stirring the oil, which prevented it from bubbling and boiling. When the candelilla wax was almost entirely melted, I turned off the heat but left the pot on the stove. I continued to stir until the rest of the wax melted, then removed the pot from heat.
So, two things. First, I really recommend using a stainless steel pot to heat the soapmaking fats and mix the soap batter because of the higher temperature. Secondly, you may find using a double boiler is a much better way to melt the wax. (Or I welcome your suggestions in the comments!)
Allow your soapmaking fats and the lye-water to cool to around 115°F. Once they’ve reached this temperature, you’re ready to make soap.
Weigh out the sodium lactate and the salt and stir it into the cooled lye-water.
Then weigh out the activated charcoal, black clay and the fragrance oil, if desired. Add these ingredients to the melted oils and wax and mix to combine with a stick/hand blender.
Now slowly pour the lye-water into the melted oils.
Mix with a stick blender on the lower setting until you reach trace, then keep going. You want a heavy trace for this recipe because of the wax to ensure you don’t get a false trace. Once you’re certain your soap batter has traced, evenly pour the chia & charcoal soap batter into the cavities of your round soap molds.
Now firmly press your premade roses into the tops of the soap in your molds’ cavities.
Cover if desired with plastic film or parchment paper and set aside in a safe location.
Your chia & charcoal soap bars should release easily from your molds the next day even if it doesn’t gel. If they don’t, simply wait another day or two.

Allow your chia & charcoal soap bars to cure 4-6 weeks. Once your soaps have cured, they are ready for use. Simply wrap and label as desired for personal use or gifting.
If you’re planning to sell your chia & charcoal soaps, be sure to label them according to FDA guidelines. Not sure how to label your creations? I highly recommend the book, Soap and Cosmetic Labeling: How to Follow the Rules and Regs Explained in Plain English, by Marie Gale.
For even more of my soap recipes and tutorials, be sure to follow my Simply Soapmaking Pinterest board and my DIY Bath and Body Pinterest board. You can also find and follow me on Facebook, Twitter, Blog Lovin’, and Instagram. Or sign up to receive new posts from Soap Deli News blog to your email via FeedBurner so you never miss a post.


