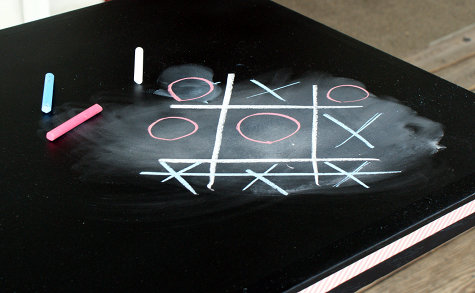
Upcycled Breakfast Table – DIY Chalkboard Game Table Craft Project
Finally, add a magnetic tin – that DIY is here – to the metal base of the table. Or, if the stand for your table is not metal, you can glue one on using Gorilla glue. Now you have a finished Chalkboard Paint Game table for kids and adults alike!
One final note. You will want to allow your chalkboard paint to dry for a full 24 hours before attempting to write on it. This allows it cure completely to avoid scratching the paint off with the chalk. After 24 hours you would then prep your chalkboard surface by rubbing the SIDE of a piece of chalk over the surface then erasing. Now your chalkboard table top is ready for games of tic-tac-toe, artwork, or whatever else the heart desires!
What kinds of games would you play on this chalkboard game table?


10 Comments
Cari
September 4, 2012 at 10:35 pm
I was wondering about Mod Podge and washi tape 🙂 Table looks great!
Rebecca D. Dillon
September 4, 2012 at 11:47 pm
Thank you!
Emma
September 5, 2012 at 2:33 am
Cool idea! Love the washi tape detail.
Jen | Acts of Craftiness
September 5, 2012 at 5:08 am
I love this idea!
This reminds me of a coffee shop I frequented in high school. Their table tops were checkers/chess boards.
Angela
September 5, 2012 at 6:29 am
Awesome!!
Arimimen
September 5, 2012 at 11:10 am
great idea!
Christine
September 5, 2012 at 12:48 pm
Oh so COOL and FUN!!!!
Thanks so much for sharing this at The DIY Dreamer… From Dream To Reality!
Bev Feldman
September 5, 2012 at 6:03 pm
What an awesome idea, love it!
Crystal
September 7, 2012 at 4:32 pm
Thanks for the idea. You make it sound so easy!
If you have time, I’d love for you to come share your post in the Mommy Club. It is a good mommy solution/resource!
Thanks and have a great weekend,
Crystal
http://www.crystalandcomp.com/2012/09/the-mommy-club-share-your-resources-and-solutions-60/
Britni
September 9, 2012 at 4:26 am
That is so cool! I LOVE it! And I like how you used washi tape and sealed it with mod podge, that’s a great idea! I would love if you shared this at my Throwback Thursday party. Thank you so much for sharing and I hope to see you there 🙂 http://www.hubbymademe.com/throwback-thursday-no-9/
Comments are closed.