DIY Skully Shot Glass Candle
 One of my New Year’s resolutions this year was to try new craft projects that I’d been wanting to try, but never got around to. Candlemaking was one of those craft projects. So what better way to get started making hand poured candles, than to create a homemade Father’s Day gift. I was really excited by how easy this project actually was – by far easier than making cold process soap – so I’ll definitely be making more candles in the future. (I’m already thinking Christmas gifts!)
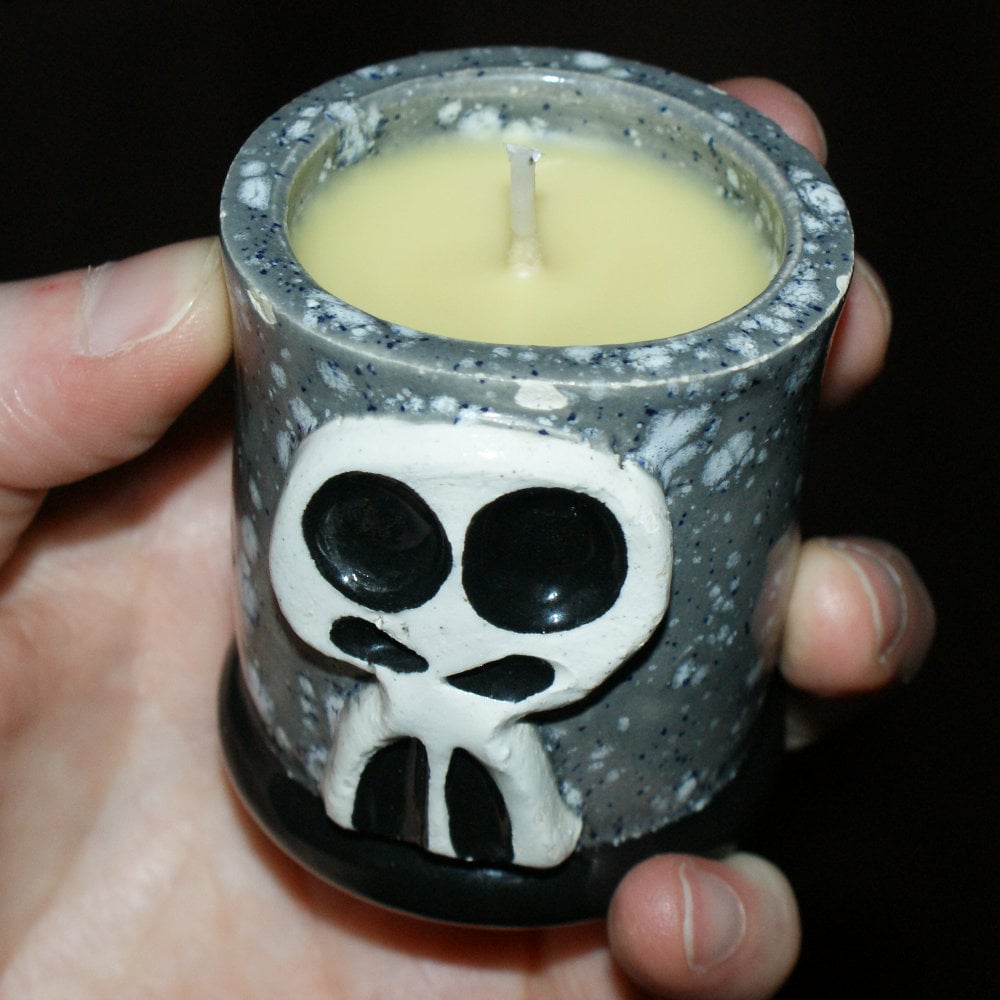
To make your own diy shot glass candle for Dad – which by the way can be used as an actual shot glass once the candle is gone – you’ll need a shot glass, beeswax, pre-waxed candle wicks, a pen or pencil, a glass pyrex measuring cup, a metal spoon or butter knife, a digital kitchen scale and the fragrance oil of your choice.
I used a handmade shot glass I had on hand that I purchased more than a few years back from JMN Pottery. However, you can also find some lovely sugar skull inspired skully shot glasses from LaPella Pottery – another potter who I have happily purchased from in the past. I used beeswax as my wax as it was what I had on hand having purchased several bars of beeswax from my a crafter on my local farmer’s market several months back. However, you can substitute beeswax with soy or paraffin wax.
To create your candles you’ll need to first center your wicks in position in your containers. You can use a pen or pencil to keep it in place where you want it by gently wrapping the top around the pencil. Next, prepare your wax. I made two candles. A masculine scented shot glass as a Father’s Day gift and a half pint mason jar in my own favorite fragrance for my own home. If you want to make candles in various sized jars later on, be sure to buy a package of wicks that will be long enough for all of the intended containers.
For the shot glass candle, weigh out 30 grams of beeswax in a glass pyrex measuring cup. Then slowly melt in the microwave at reduced power until melted. USE A POT HOLDER to remove the container of wax. It will be really hot and you don’t want to get burned. Next, weigh out 3 grams of the fragrance oil you plan to use and stir it into the melted beeswax. Then slowly pour the beeswax into the shot glass around the wick. Don’t try to reposition the wick after you’ve poured the wax. Your wick will likely come out of the metal tab if you try to do so. I learned this from experience and lost two wicks before I finally got it. Alternately, you can toss the pencil and opt for using a metal wick candle centering device.
To make a 8oz. half pint sized mason jar candle, you would used 150 grams of beeswax and 15 grams of fragrance oil.
Once you’ve poured your candles, all that’s left is to sit back and allow them to cool completely. Oh, and the clean up. Just FYI clean up is not much fun as beeswax is really hard to clean up once it has cooled. If you’re a klutz like me, I suggest laying down beeswax on your working surface in case you spill some of the wax. I had to scrape wax off my countertop with the backside of a butter knife. You may also want to use a pyrex measuring cup dedicated to making candles only as removing all of the wax from it will be even tougher.
I hope you have fun with this project. I know I did especially since I was able to enjoy the results so quickly!


1 Comments
Tabitha
May 20, 2013 at 3:08 pm
What a fun little candle project – thanks for sharing! I’m not sure my attempt will turn out quite as good as yours, but we’ll see how it goes:)
Found you via Etsy’s Blog Team!
Comments are closed.