How to Transfer Photos to Canvas Using Mod Podge
Don’t let your old school photos sit a box collecting dust. Hang them on your wall instead! Learn how to transfer photos to canvas using Mod Podge with this easy weekend craft tutorial.

Since I haven’t yet had a chance to get my own hands dirty since my getting back from my vacation, I thought I’d take the opportunity to share another weekend project. This tutorial was created by my coworker, Erica. She is, like many of us, on the fast track to becoming a bonafide Pinterest addict. So lately she’s been trying new craft projects she’s discovered on Pinterest on a pretty regular basis. You might recall the DIY crayon canvas artwork she brought into the office recently. Or perhaps you remember the pretty handmade tile coasters she made for me last Christmas. Her next project is going to be a DIY pallet coffee table.
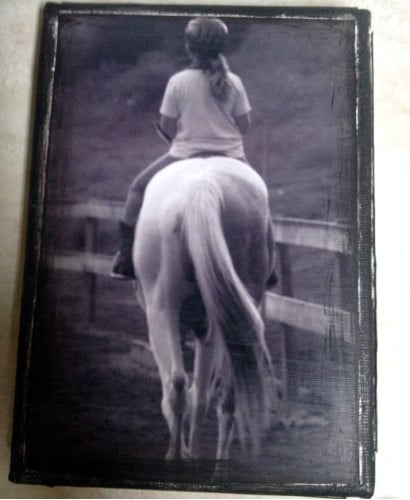
However, just before I left for vacation, Erica shared her step-by-step photos of her newest project for making DIY Mod Podge canvas photos. This photo transfer method is super easy and lots of fun. Learn how to transfer your photos to canvas using Mod Podge via the step-by-step photo transfer tutorial below!
How to Transfer Photos to Canvas Using Mod Podge

Materials Needed to Transfer Photos to Canvas:
Art Canvas, same size or larger than your photograph
Matte Photograph, of choice
Mod Podge
Foam Brush
Scissors
Clear Acrylic Sealer
Paint and/or Decorative Scrapbook Paper

Step 1:
Cut the photo you’ve chosen to use to fit your canvas if necessary. If you’d like a decorative border around the front of the picture, cut the photograph so that it’s slightly smaller than the canvas dimensions.

Step #2:
Erica chose to use polka dot scrapbooking papers as a decorative edge for the side of her Mod Podge photo transfer canvas. If you’d like a decorative border on your photo transfer canvas as well, then complete this step first.
Cut paper into strips to fit along the edges of the canvas you’ve chosen for your photo. Next, use Mod Podge to glue the paper strips along all sides of the canvas. Do this by applying Mod Podge to the sides of the canvas first. Then place the papers onto the Mod Podge. Finally, brush an additional layer of Mod Podge over the papers. (The parts along the edges that left uncovered will be painted later on.)

Step #3:
Once the papers have adhered to the sides of the canvas, you’re ready for the next step.
Apply a layer of Mod Podge to the front of the canvas where the picture will be applied.

Step #4:
Now center the photo you’ve chosen to transfer to canvas onto the front of canvas. Press the photo into the glue, then brush another layer of Mod Podge on top of the photograph.

Step #5:
Once the Mod Podge dries, simply brush black paint (or another color of your choice) around the edges of the photograph. Do this on the sides of the blank canvas that had been left exposed as well.
(This step can be neat or messy depending on your own personal taste. There’s no right or wrong way to do this step!)
Once the paint dries, seal the photo canvas with a clear acrylic spray. (I’ve always used Plaid brand in matte or gloss.) Your new photo canvas masterpiece is ready to display as soon as the glue dries!
Now that you know how to transfer photos to canvas using Mod Podge, you can get started on creating a unique accent wall for your home!
Discover more of my craft projects & ideas! Sign up for my semi-weekly newsletter to receive updates when new projects are available. You can also follow me on Pinterest, facebook and instagram.


3 Comments
Betty Morales
August 1, 2013 at 5:32 pm
What a great project! I will have to find a nice photo I like to try this!
mary b
September 11, 2013 at 11:02 pm
how do you keep the ink on the photo from bleeding when you put the mod podge on??
Crystal
October 14, 2013 at 2:20 am
I think that’s y
You are suppose to use matte pictures and not the glossy one!
Comments are closed.