

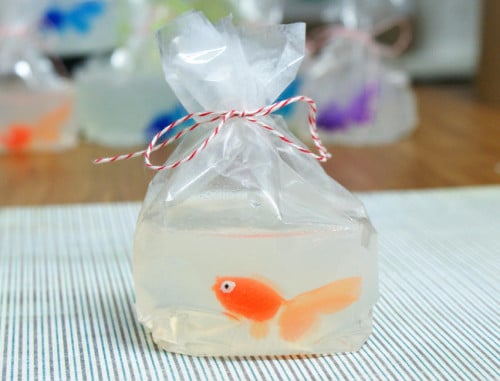
DIY Goldfish in a Bag Soap for Kids: Melt and Pour Soap Tutorial
This melt and pour soap tutorial for making your own DIY goldfish in a bag soap not only makes a super cute gift for kids but is also perfect for DIY party favors. While they look easy to make, these soaps are actually a bit tricky to perfect.
I recommend buying more materials than you think you’ll need and be prepared to exercise a bit of patience. It took me more than a few tries to get these adorable DIY goldfish in a bag soaps just right.
Tips for making Goldfish in a Bag Soap.
Stick with a clear suspension soap base over a traditional melt and pour soap base for less frustration and fish that stay put without having to pour the soap in layers. I tried both and the suspension soap base made this soap making project much easier.
Don’t overheat your soap! If it’s too hot your bag could leak and getting that fish to stay where you want him will take longer. You also need to keep your suspension soap base below 160°F to keep it at its peak performance.
Use clear cello bags NOT candy making bags when making DIY goldfish in a bag soap. The plastic is very different and the candy treat bags will melt under the heat of the liquified soap base.
Make sure you have clean hands before you handle the cello bags. The tiniest bit of soap residue on your fingers means residue on the cello bag.
Allow yourself plenty of time to make each DIY goldfish in a bag soap. If you try to rush it and it doesn’t work out the first few goes, the frustration of a deadline will only make this project harder and it’s probably going to raise your blood pressure. I worked on this for several days to get it just right and had to switch my soap base and my bags.
While you may be tempted, don’t spray the top of this soap once it’s in the bag to knock off any air bubbles on the top. Rubbing alcohol will leave an unsightly residue on the bag. Besides, fish like to make bubbles!
Make each DIY goldfish in a bag soap one at a time. If you try to make more than one at a time – at least starting out – you’re going to get overwhelmed with the details of pouring the soap without getting drips on the sides of the bag or fish that end up upside down. Plus, you really want the lowest temps possible for the soap base so making them one at a time is ideal.
Here’s how to make DIY goldfish in a bag soap.
DIY Goldfish in a Bag Soap
© Rebecca D. DIllon
Ingredients:
5.5 oz. clear melt and pour suspension soap base
.15 oz. fragrance oil of choice
Supplies & Materials:
Toy goldfish
Clear cello bags
Bakers twine
Instructions:
This melt and pour soap recipe yields one DIY goldfish in a bag soap.
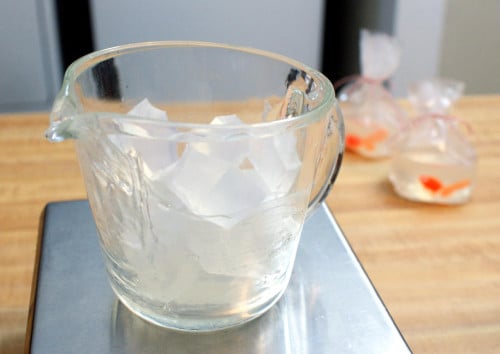
Begin by weighing out the suspension soap base. Cut it into small chunks – so it melts more quickly at a lower temperature – and heat at 50% power in the microwave until almost completely melted through. (Alternately you can use a double boiler.) Watch the soap carefully so it doesn’t overheat. If it starts to bubble, remove it immediately from the heat source to avoid overheating.
Now weigh out the fragrance oil using the plastic transfer pipette to add the fragrance directly to the soap base. (Be sure to choose a fragrance oil without vanilla content to keep your soap from turning brown. Additionally, clearer fragrance oils work better than those with a yellow cast.) The pipette will keep you from accidentally adding too much fragrance and keep the fragrance from sliding down the side of the jar. Stir well.

Allow the soap to cool slightly, until a thin layer of soap starts to solidify on top of the soap. Mix the soap again then slowly pour the soap into a bag. Be careful to pour the soap directly into the center of the bag so it doesn’t hit the sides going down. You may want to stop partially through the process to readjust the bag. If you don’t have a steady hand, place the bag in a dish that will hold the bag and still keep it slightly upright.

Place your goldfish in the bag and use a pipette or chop stick to press the fish in the desired position against the very front of the bag. Leave the pipette in the bag to hold the fish in place until the fish stays in place upon removing the pipette.
For a wider based bag, leave the soap to cool with the bag open, then tie closed once the soap has solidified completely. Otherwise, gently gather the top of the bag while the soap is still soft and tie off with baker’s twine or ribbon. This will move the soap up the bag and create a slightly narrower base. I did mine both ways and it’s really just personal preference.
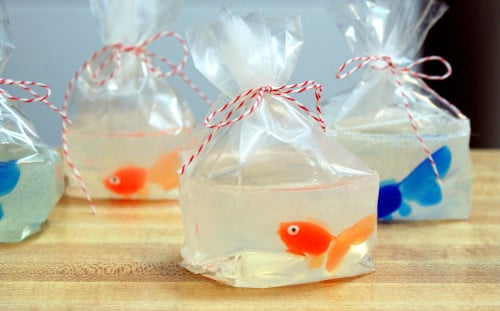
Mix it up. For “colored” water, add a pinch of superfine emerald green or Caribbean blue glitter when you add the fragrance.
To use this DIY goldfish in a bag soap, simply peel off the plastic and scrub away!
For more fun homemade projects you can craft for kids, be sure to check out my Pinterest boards. You can also find more homemade melt and pour soap recipes and projects on my DIY Bath and Body Pinterest board. Or follow me on Blog Lovin‘, Facebook, Twitter and Instagram!


10 Comments
Jen
April 21, 2014 at 10:17 pm
I love how cute AND easy these are! So creative! Thanks for sharing!
Cari
April 22, 2014 at 9:59 am
Adorable! Thanks for all the awesome tips. I hope you didn’t have too much of a mess learning those tips 😉
Zylo
April 23, 2014 at 1:25 am
This is such an adorable idea! This would be great for Christmas stocking stuffers – I’m sure no one else would have given them the same one!
Debbie
November 5, 2014 at 11:39 pm
I love this idea and want to do it for the kids favors at my son’s vintage circus 1st birthday. If I want to make 30 bags, how much soap do I have to buy?
Rebecca D. Dillon
November 6, 2014 at 8:31 am
Each one is 5.5 oz. So 5.5 oz. x 30 = 165 oz. or 10lb. 5 oz.
Debbie
November 7, 2014 at 12:00 am
Thanks soooo much! I guess I missed that part! You should offer to make them for purchase!!
darla
January 31, 2015 at 12:53 pm
sooooooooooooooooooooooooooooooooooooooooooooooo cute
sol
February 6, 2015 at 4:41 pm
I love It !!!
Where can I find the fishes ? They are cute !!
I am from Barcelona
Thanks a lot !!!
Rebecca D. Dillon
February 7, 2015 at 4:16 pm
I’m in the USA so I’m not sure where you could source them outside of the country. Sorry.
Lisa
March 27, 2015 at 5:45 am
These are so adorable!! Are the fish made of soap or rubber?? I’d love to know where you bought them so I could check them out.
Thanks for a great tutorial!!!
Comments are closed.