DIY Quick Tips and Must Have Soapmaking Equipment

There are often times when making your own homemade bath and beauty products that you come across some rather heat sensitive ingredients that you just don’t want to use a microwave for. Sure a microwave is quick and easy but sometimes it can go a little overboard. Not to mention burnt waxes don’t smell pretty. If you’re just getting started and not ready to invest in a double boiler, no worries.
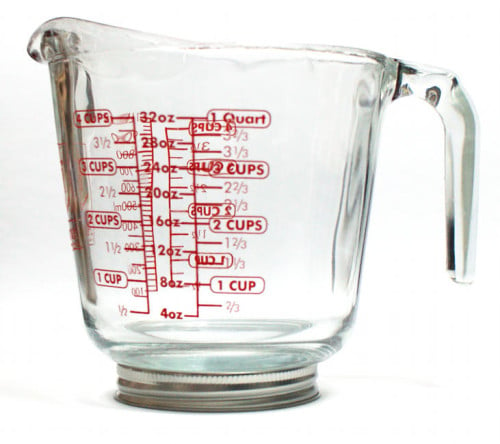
My friend and fellow blogger, Cari Dunn of Everything Pretty, told me that she uses a canning ring to convert a glass Pyrex measuring cup into a double boiler in a pinch. Simply place the canning ring your pot and set the measuring cup on top, then add your water around the measuring cup and turn on the heat! Or try a Universal Double Boiler for less that will fit your existing 2 quart and 4 quart sauce pans!
Speaking of Pyrex measuring cups, these have become a staple piece in my stash of soapmaking equipment. I own two each of the one cup and two cup measuring cups and one of the four cup or quart measuring cups. Following are some of my other favorite soapmaking tools and equipment I use on a regular basis.

A good scale is an absolute must. I’ve been using a Baker’s Math Kitchen Scale for years. It measure in ounces, grams, kilograms, pounds and pounds with ounces. It’s heavier duty than standard kitchen scales and postal scales, doesn’t need re-calibrating and comes with a 30-year warranty. You’ll need it weigh out ingredients for soap recipes as well as many bath and body recipes.
A hand blender or stick blender is another must have accessory. It takes the hardest physical part of soapmaking – the mixing – out of the equation and helps you not only achieve trace faster, but also ensures a evenly mixed batch of soap. In twelve years I’ve only gone through two stick blenders. My latest, and also the cheapest, has lasted longer than the first so it doesn’t need to be brand specific.
Loaf molds. While I regularly use my trusty wooden loaf soap molds my dad made for me – these are the size I use for the cold process soap recipes I post here on my blog – silicone molds have become commonplace and can help make crafting cold process soaps simpler. As there’s no need to line these molds it helps to save on time and waste. The Crafter’s Choice™ Regular Silicone Loaf Soap Mold is a great silicone loaf mold and most all of the soap recipes I create for Wholesale Supplies Plus’ eHandmade Magazine will fit perfectly inside this mold.
Bakers & Chefs 12″ x 3000ft. Foodservice Film continues to be a staple for my finished products. It’s not only inexpensive for the quantity but it sticks much better than regular plastic wrap making it a both a smart and simple choice for wrapping melt and pour glycerin soaps and giving them a more professional look. It also works great on cold process soaps. You’ll find that the 12″ size is perfect for most standard size bars of soap.
Graduated Plastic Transfer Pipettes are great for when you’re making smaller sized recipes for things like lip balm and salves where you need to measure out fragrance, oils and flavors in smaller quantities. These can be purchased in bulk and are relatively inexpensive so there’s no reason not to use a fresh pipette for each ingredient. The measurement marks make it easy to measure out your liquid ingredients in both millimeters and portions thereof.
Small graduated glass beakers or plastic beakers are great for pouring things by hand when you need a steadier hand. I love the 50ml beakers for pouring my lip balms into tubes. Trying to use a syringe can cause the lip balm to cool too quickly while a plastic transfer pipette can melt if you try to add the liquid lip balm to the tubes too hot. With the beakers both of those issues are solved and I find even without a lip balm filling tray, my not so steady hand can fill a lip balm tube on a kitchen counter without having to secure it in any way.
Silicone Spatulas are another tool I always have handy for helping get all of my soap in the mold as well as for random bath and beauty recipes. I also have an extra sturdy metal spoon with a thick handle that won’t bend when scooping out solidified coconut or palm oils from tubs and a basic 1 cup measuring cup scooping out ingredients to be weighed like sodium hydroxide and palm kernel flakes.
I also own a trio of stainless steel pots so I always have the perfect size to fit my cold process soap recipes whether they be large or small. It also allows me to make three small batches at one time.
Interested in learning how to make your own homemade cold process soaps from scratch? Be sure to check out my soapmaking tutorial or follow my DIY Bath & Body board on Pinterest for an ever growing collection of handmade soap recipes and bath and beauty DIY’s.
Do you make homemade soaps? I’d love to hear what your favorite tools and equipment are! Share your favorites along with any tips and tricks you have that make the job easier!


