
How to Make A Wooden Cold Process Loaf Soap Mold

I’ve had some people ask me how to make a basic wooden loaf soap mold for cold process soap, so I thought I’d share a tutorial on how to make your own soap molds. This wooden cold process loaf soap mold is so easy to make and it will last forever. My dad is handy with wood and power tools so he made me a bunch of these, however, if you don’t own power tools, it’s possible to get the pieces for the molds cut at no charge.
 Each of these homemade cold process soap molds will hold approximately 2.75 lbs. of (cured) soap and will make approximately 10-12 4oz. bars depending on how large you cut them. If you’re having trouble figuring out how much your soap will weigh once cured, my average recipe for one of these molds uses 36oz. in oils & butters (fats) prior to adding the lye/water, and fragrance.
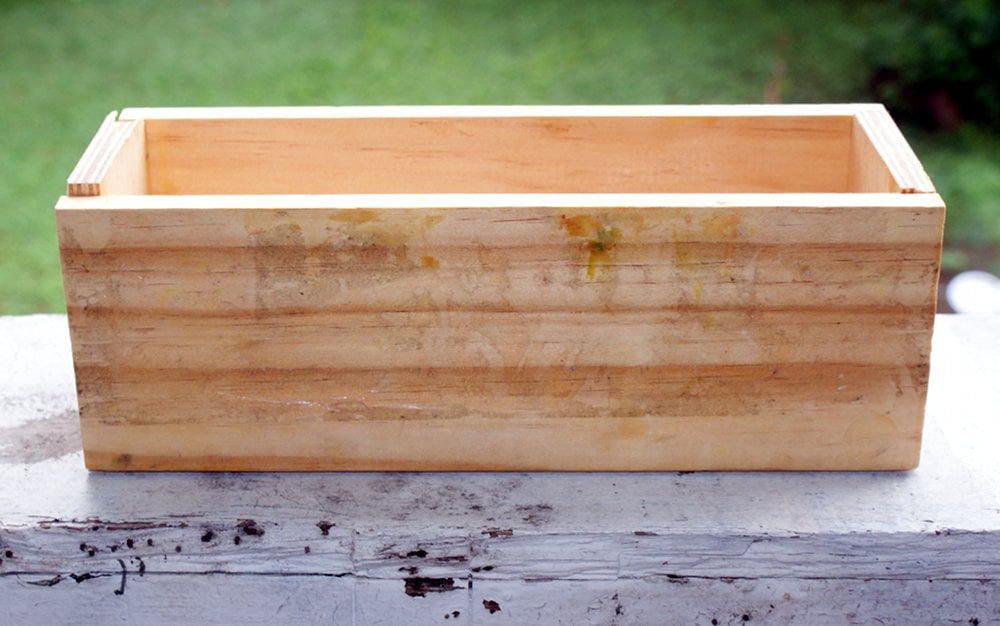
 To create one mold you’ll need to use wood that is 1/2″ thick. I used craft wood from Lowe’s. I have been told that if you are buying wood that an associate at Lowe’s will cut it down into the dimensions you use if you ask. For the two long sides, you’ll need to cut two pieces of wood that measure 12″ x 4″. The two short sides should be cut to 3 1/2″ x 4″ and the bottom piece of the mold should be cut to 3 1/2″ x 11″. The final dimensions of the soap mold will measure (from the outside) 12″ Long x 4 1/2″ Wide x 4″ High.
You’ll need to use wood clamps and wood glue to assemble your mold as pictured above. The two short sides fit on the inside of the two longer sides to form a rectangle and the bottom piece of the mold fits on the inside bottom of the mold. Use glue and clamps to hold the pieces together until dry. If you don’t have clamps or want to add extra reinforcement, you can use a cordless screwdriver to place screws where the sides connect.
Making a lid for these is optional. Honestly I’ve never needed to use a fancy lid as cutting cardboard to fit on top of the molds works just fine during the curing process. I simply place cardboard on the top of the filled mold and then cover with towels to insulate during the 24 hour saponification period.
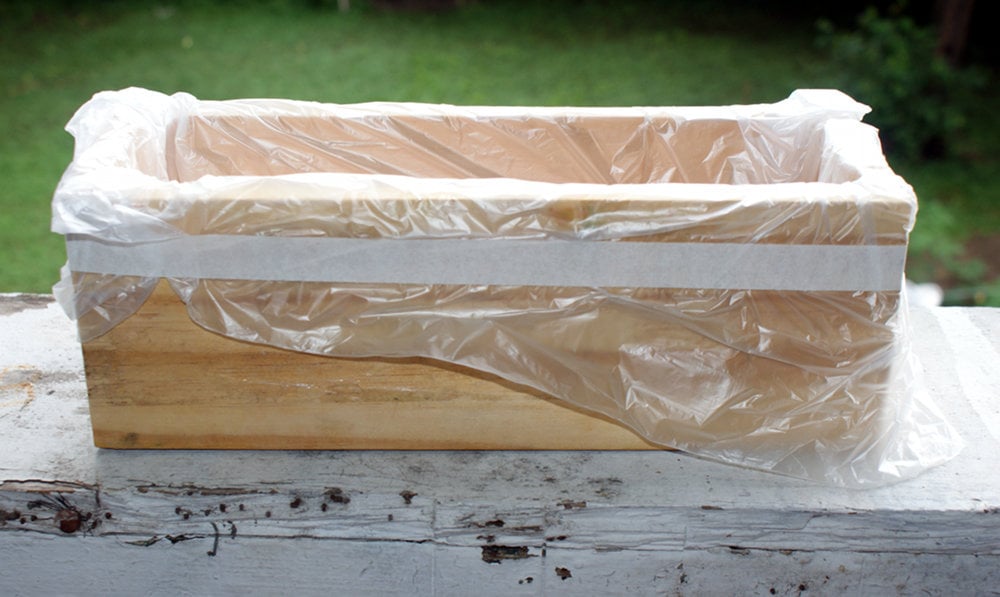 Lining your soap molds before use is essential to being able to get your soap out of the mold. If you don’t line your mold, your soap will get stuck. I used to cut parchment paper to line my molds as demonstrated in this the same process that this tutorial by Inner Earth blog uses with contact paper. Basically you fold the paper in a way that is similar to wrapping a present but with an open top. However, parchment paper and contact paper can be expensive and the process for lining molds this way can be tedious and time consuming especially if you are making multiple or large batches at once. Because of this, and due to the stiffness and occasional pain in my hands from the fibro, I use trash bags to line my molds. If you’re practical and don’t mind a few minor creases on the sides and bottom of your soap, then this method may be the one for you.
I got this ideas from another local soapmaker who I used to sell alongside at our local Farmer’s Market. She used large 20 gallon kitchen trash bags to line her molds, then once she unmolded the soaps, she’d re-use the trash bags for actual trash. (Plus the soap gave them a nice, fresh scent.) What I use are thin, clear office trash bags. I bought a huge box of 1000 10 gallon light duty commercial trash bags to line my molds with as they a lot less expensive than parchment paper and can be used again for my office trash. (They are super cheap at Sam’s Club and office supply stores.) To line a mold I simply unfold the bag – but don’t open it – press it into the mold and then tape the outer edges where the bag folds over the outside of the mold to keep it in place. This method is gentle on hands and super quick. I can now line all nine of my molds in 5 minutes or less. Of course, how you choose to line your molds is personal preference. I recommend doing whatever works best for you.
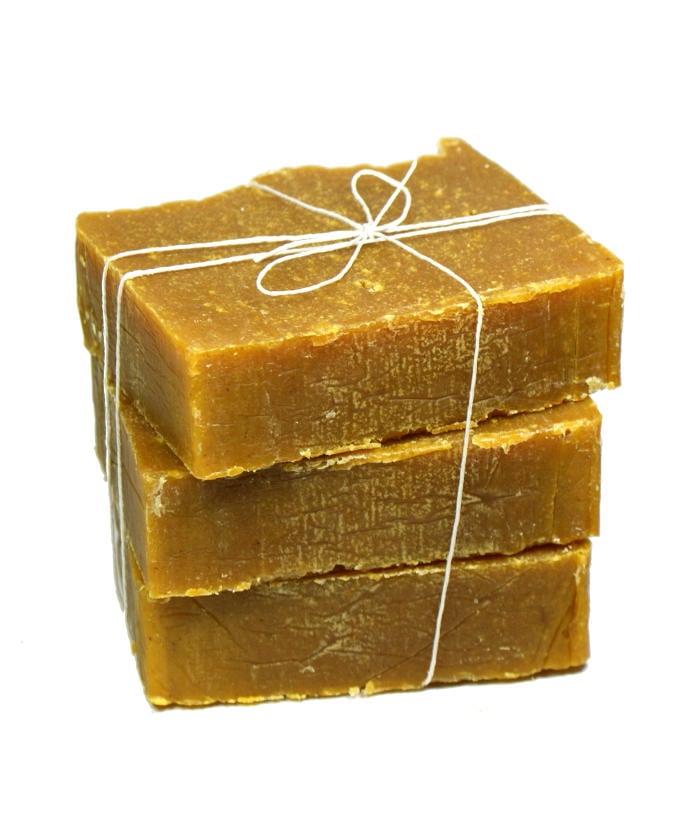
Once your soap has set you simply lift the soap from the mold and peel off the liner, cut into bars and allow to cure a minimum of 3-4 weeks.
To use these molds for melt and pour glycerin soap, simply line with trash bags as indicated for cold process soap.
Looking for lye?
On a side note, I wanted to share with you where to buy sodium hydroxide (lye) for making your soap. You used to be able to buy Roebic brand lye from Lowe’s. 2lb. ran $8.99. Several months ago I noticed that their price for a 2lb. container of Roebic lye had gone up to $16. Recently, they stopped carrying it all together. I imagine this has something to do with the illegal meth labs that seem to be sprouting up everywhere. Therefore what I recommend is to look in your local yellow pages for a local chemical supply company. I am lucky enough to have one in my hometown called ChemSolv. ChemSolv sells 99% pure sodium hydroxide (which is suitable for soapmaking) in 55lb. bags. These bags with tax – in case you don’t have a resale license – runs $38 and change. They currently have locations in Roanoke, VA (my hometown), Colonial Heights, VA, Piney Flats, TN and Rock Hill, SC. I purchase what they call caustic soda beads.
If you don’t have a chemical supply store near you, you can buy 2lb. containers of Food Grade Sodium Hydroxide from Amazon![]() . Even with shipping, these containers run cheaper than 2lb. containers of Roebic brand lye from Lowe’s – assuming your store still carries it. Plus, currently if buy 5 2lb. containers of lye, you receive $5 off your purchase. You can also find Potassium Hydroxide Flakes
. Even with shipping, these containers run cheaper than 2lb. containers of Roebic brand lye from Lowe’s – assuming your store still carries it. Plus, currently if buy 5 2lb. containers of lye, you receive $5 off your purchase. You can also find Potassium Hydroxide Flakes![]() for liquid soapmaking available through the same company through Amazon
for liquid soapmaking available through the same company through Amazon![]() with the same deal. Other brands of lye you can use include Red Hot Devil Lye Caustic Soda Beads
with the same deal. Other brands of lye you can use include Red Hot Devil Lye Caustic Soda Beads![]() and RED CROWN High Test Lye
and RED CROWN High Test Lye![]() .
.
If you are just venturing into making homemade soap and want to learn how to make soap, be sure to visit my DIY Cold Process Soapmaking Tutorial. Or if you’re looking for skin conditioning bar of handmade soap, check out my Skin Loving Natural Cold Process Soap Recipe. (It will fit into one of the wooden soap molds described above but will make large square bars – about 5 1/2oz. – 6oz. each – rather than rectangular bars of soap.)


17 Comments
Rhondda Mol
June 12, 2013 at 2:46 am
I pinned this! Thank you for sharing – I am going to take a look at the recipe for the soap too 🙂 Rhondda
Adrianne at Happy Hour Projects
June 14, 2013 at 12:10 am
Temptress.
Haha.
I really, really want to try my hand at soapmaking. I can’t wait until we move and I have more space (well, smarter space) for ventures like this. Love this post, I’m pinning it!!
Robin Williams
June 20, 2013 at 9:08 am
Loaded with great info. Thanks!
Alison
June 21, 2013 at 1:33 pm
I am doing lots of research before trying my hand at soap making. My question is if I am to do a hot process soap will these molds still work ? And what type of liner would you recommend? Of course I want to try CP too so this is a perfect project to do beforehand 🙂
Thank you,
Alison 🙂
Rebecca D. Dillon
June 21, 2013 at 6:18 pm
Yes, you can use them for hot process soap as well. You would line them the same way.
Gecko
July 11, 2013 at 10:25 am
Rebecca, Love this! How do you evenly cut the loaf into bars? (Do you cut in or out of the box, & what do you use)? I’ve heard of using wire, & seen the metal w/ wood grip, but it seems like the metal w/ wood grip would need to be the perfect width, & I would need to make mold interior dimensions fit the metal w/ wood grip. I also have hand problems (nerve damage) so I need the least hand intensive method to do this. Also, do you just turn the finished soap in mold upside down & tap to remove it? I really want to do this & appreciate any help w/ this slather of questions. Thanks!!
Rebecca D. Dillon
July 11, 2013 at 4:25 pm
I use a soap guide/cutter to cut even bars. I have a diy for a soap cutter here. And I just use a Chef’s knife. If you cut them right away while they are soft it doesn’t require much effort. To remove the soap, I just lift it out of the mold by the plastic bag I lined it with and peel off the soap.
Lae McLaughlin
September 24, 2013 at 4:34 am
Out of curiosity, could this mold be used for melt & pour loaf soaps, or would you recommend something different? I’ve been using loaf pans & lining them with parchment paper. It works fine, but gets to be time-consuming to deal with when I make large batches. And trimming the loafs when they’re done is quite tedious.
Rebecca D. Dillon
September 24, 2013 at 8:44 am
Yes, you can use these for melt and pour soaps. I have. However, you must line the mold with plastic so there are no gaps. I use an office trash bag since it’s quick and easy. You can also use cling film and tape at the top edges. If you want perfect bars I would consider using a silicone cavity soap mold.
Lisa Barrios
January 13, 2014 at 8:18 pm
I was wondering.. if you are making the soap on the stove., do you let it cool before pouring it into this mold with a plastic bag in it? How long to cool, or to what temperature?
Rebecca D. Dillon
January 13, 2014 at 9:39 pm
You can find the answers to your questions and learn how to make soap within this tutorial.
Beka
February 9, 2014 at 12:05 pm
Hello! Is that just 1/2 in plywood? I don’t know what you mean by craft wood. Thanks!
Rebecca D. Dillon
February 9, 2014 at 12:16 pm
For some I used plywood others craft wood. Craft wood is a solid wood rather than pressed wood like plywood. It’s similar in size, a little nice but also a little more expensive. It’s basically a choice of aesthetic.
Maria
March 6, 2014 at 11:29 pm
I was just wondering. Would it be too much is the wood was thicker than 1/2 inch?
Rebecca D. Dillon
March 7, 2014 at 8:56 am
You could but your exterior measurements will change and you’d need to account on all sides for the extra width the wood adds so the interior measurements stay the same.
Empress B
October 18, 2014 at 9:46 pm
Am so proud of you! am from Africa,and this has been of great help to me!
Big hugs and Much Love
Damaris
October 30, 2014 at 7:52 pm
Thanks for sharing. I live in Manassas, VA i will go to your hometown for my lye. Gracias.
Comments are closed.