

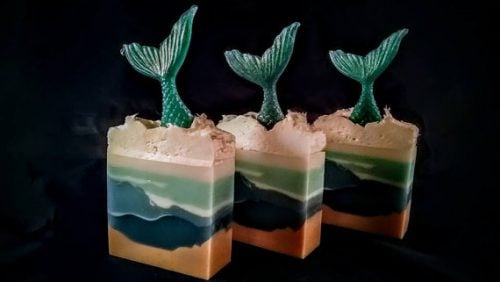
Mermaid Soap Tutorial
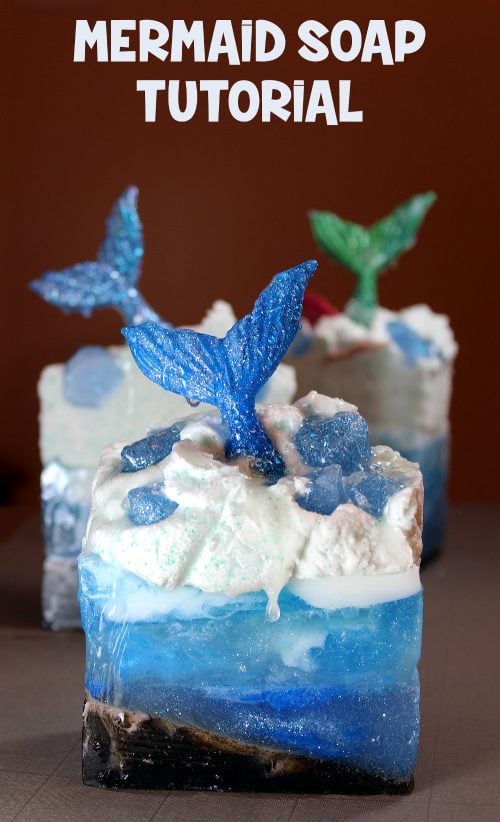
Make waves with this awesome mermaid soap tutorial that lets you explore your creative side!
Crafted using a combination of melt and pour soap bases, this soapmaking project makes a fun filled weekend project you can enjoy with friends or family!

There are three parts to my mermaid soap tutorial. You’ll start by making your mermaid tail soaps and other soap embeds like sea creatures or shells as desired. Then you make an ocean soap loaf. Finally you whip up a soap frosting and bring all the parts together. Here’s how it’s done.
Mermaid Soap Tutorial

You’ll begin by making the mermaid tail soaps. You can make however many you like depending on the size of your loaf mold. I used Stephenson’s Natural SLS Free Melt and Pour Soap Base for this step. How much soap you’ll need will depend on how many mermaid tails you’ll be making at one time. If you only have one silicone mermaid tail mold then you’ll need to make them one at a time. I bought three small 3″ x 2″ mermaid tail silicone molds for my mermaid soap tutorial.

Each of my mermaid tail soaps weigh about .35 oz. So if you have the same mold you would multiply .35 oz. by the number of molds you have to determine how much soap to use. (If you have a different mold, simply melt some soap and pour it into one of your molds. Remove the soap once it has solidified and weigh it to figure out how much soap base you’ll need.)
Once you have the total weight of soap needed that will allow you to figure out how much fragrance oil you’ll need to scent your mermaid soap tails. If you are scenting your soaps with 2% fragrance oil, multiply the total weight of soap base you are using to make the tails by .02 to determine how much fragrance oil you’ll need.
Now simply weigh out your soap base, cut into chunks and melt. You can melt your soap in a double boiler, a small melting pot or the microwave. Once melted, mix in a soap colorant of your choice. Then weigh out the amount of fragrance oil you need and stir into the melted soap base.
Next, pour the soap into your molds. Use a spray bottle with isopropyl (rubbing) alcohol in it to remove any air bubbles by spritzing the alcohol onto the soap you’ve poured into the molds.

Once the mermaid tail soaps have solidified, gently remove them from the molds. I placed mine on a cutting board so I could contain my mess when I started painting my tails so they’d sparkle.
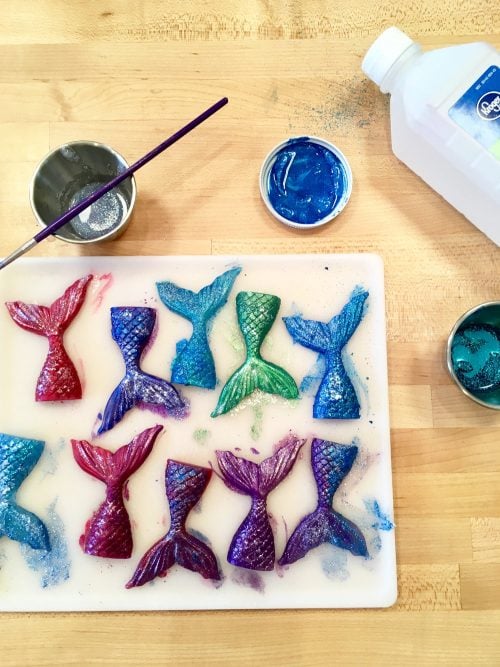
I used both skin safe mica and glitter to paint my mermaid soap tails. To do this I simply added rubbing alcohol to several small containers and mixed the mica or glitter into the alcohol. Then I painted mermaid tails with the various colors.

I specifically used the micas and glitters from Nurture Soap here and layered the colors for visual interest.

I also made a few other soaps from an ocean themed silicone mold to use as embeds in my mermaid soap loaf.

Additionally, I also created soap diamonds using a diamond silicone mold, Stephenson Suspension Melt and Pour Soap Base, a small amount of blue mica, glitter and Super Sparkles mica. (These were a bit challenging to pour due to their size. Luckily soap makes for an easy clean up.)

Once I’d made my mermaid tails and other soap embeds I moved on to making my ocean soap loaf!
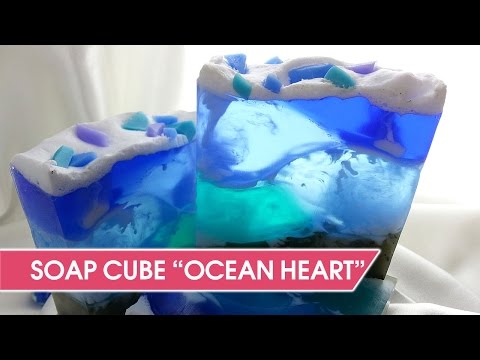
Here’s a great video tutorial from Soap Fantasy that shows you how to create your own ocean swirl soap. I didn’t follow the tutorial exactly but it gives you the information you need to create your own custom ocean soap for your mermaids to swim in!

For the ocean floor I used the Stephenson Suspension Melt and Pour Soap Base and mixed both corn silk powder and flax seed powder into the melted soap along with a small amount of soap colorant. I didn’t use a specific amount of soap for this. However, you’ll need to weigh how much soap you are using for each layer of your ocean melt and pour soap loaf so you know how much fragrance oil to add to scent your soaps.

As I don’t have a silicone loaf soap mold, I used a wooden loaf soap mold and lined it with an office trash bag instead.
I propped my mold up slightly on one side and used a brick of soap base to hold the mold in place on my work surface. Then I poured my melted suspension soap base into my loaf mold.
Next, I melted a small amount of white melt and pour soap base into the same container I melted the brown soap in to swirl gently into the poured soap. I used Crafter’s Choice Detergent Free Baby Buttermilk Soap for this step. As the Stephenson soap bases and the Crafter’s Choice soap bases seem to have different melting points, it worked well for this particular soap to use a combination of bases.
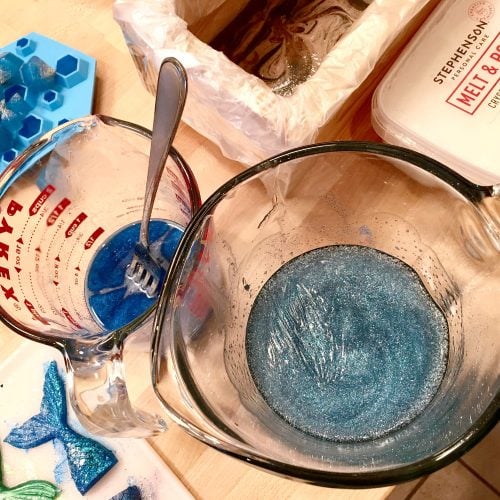
While the brown soap was setting up, I melted and mixed two different blue soap bases with mica and fragrance for the water. I used Crafter’s Choice Detergent Free Hemp Soap Base for the deeper blue soap. For the lighter, sparkling blue soap, I used the same suspension soap base, mica and glitter I used for my soap diamonds.
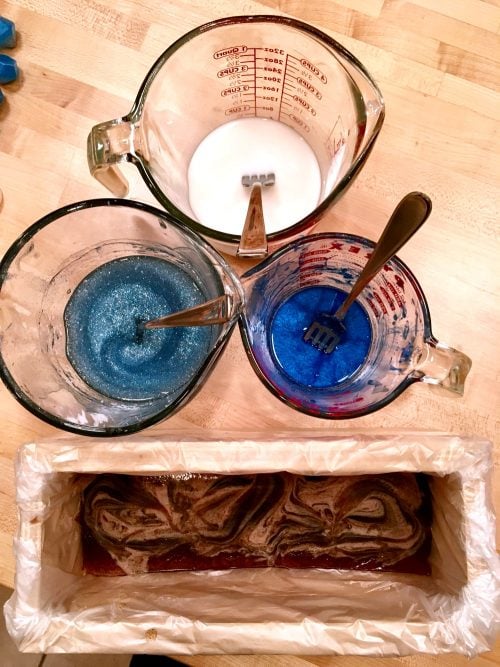
In a third container I melted and scented the white baby buttermilk soap base.

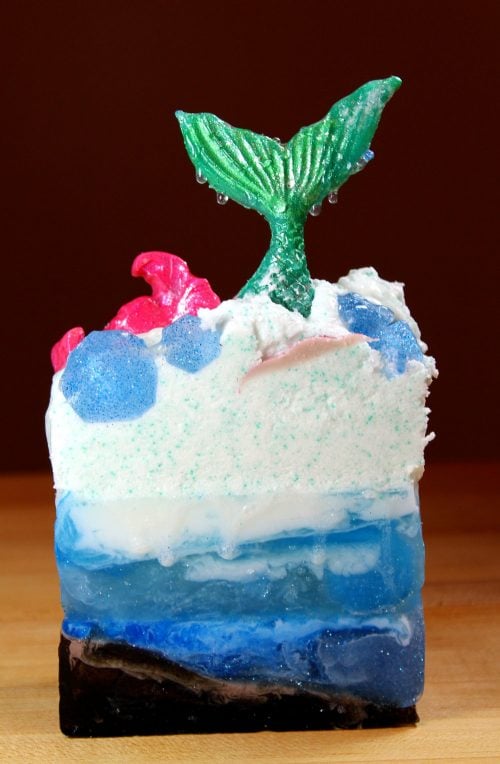
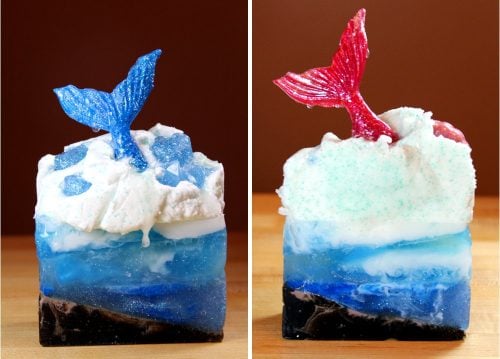
I then poured and layered the three different colors of soap at slightly different temperatures on top of the hardened brown soap. Once the second layer had set up, I repeated the process with an additional third layer.
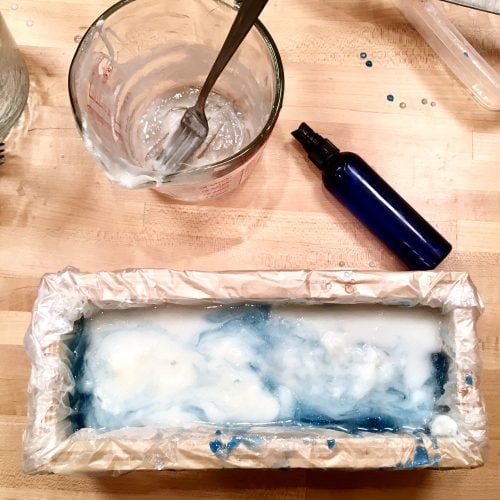
Finally, I poured a fourth layer of melted white soap base on top of the third layer and swirled it gently into the previous layer just prior to it fully hardening. Be sure to spritz the tops of each of your layers after pouring to get rid of any air bubbles that may occur, unless desirable, and before you pour a new layer on top of an old one.
Once your melt and pour ocean soap loaf has set up completely, you’re ready for the next step in my mermaid soap tutorial. For this step we’ll be making “sea foam” or soap frosting to adhere the mermaid tails to the ocean soap loaf. (Alternately, you can simply skip the next step and insert your mermaid tails into the final layer of your ocean soap loaf before it fully hardens.)

To create the “sea foam” that my mermaids are swimming in, I whipped up a semi-solid sugar scrub from a combination of butters, melt and pour soap base, oils and emulsifying wax similar to my exfoliating whipped sugar scrub recipe found here. I also included green jojoba pearls in the mix.
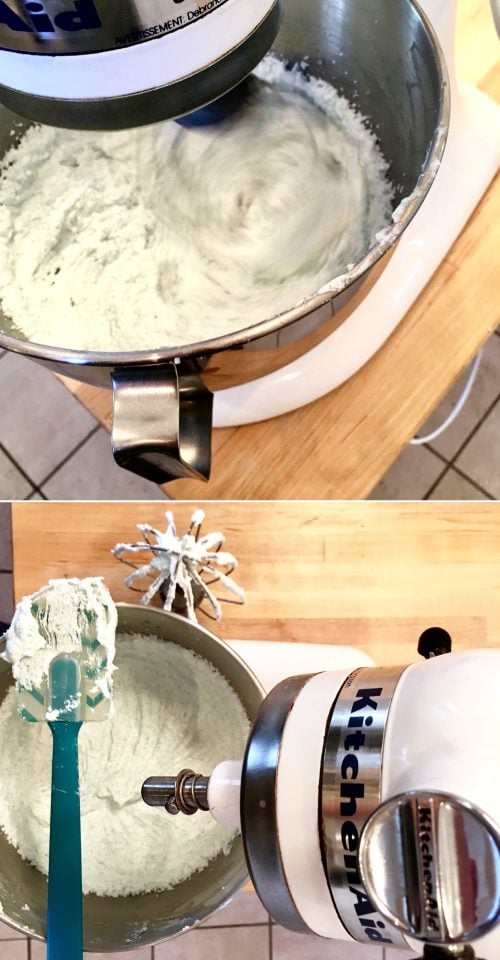
I whipped the sugar scrub in a KitchenAid stand mixer. Then, once it was stiff enough, I used a spatula to spoon it onto the top of my ocean soap loaf. Alternately you can also pipe the “foam” onto the soap using pastry piping bags and tips.
You don’t have to use a sugar scrub for your foamy top though. You can also use a basic soap frosting recipe (4 oz. of melted soap base and 2 Tablespoons of liquid soap) or your own favorite soap frosting recipe whatever that may be! You could even use a bubble bar frosting recipe.

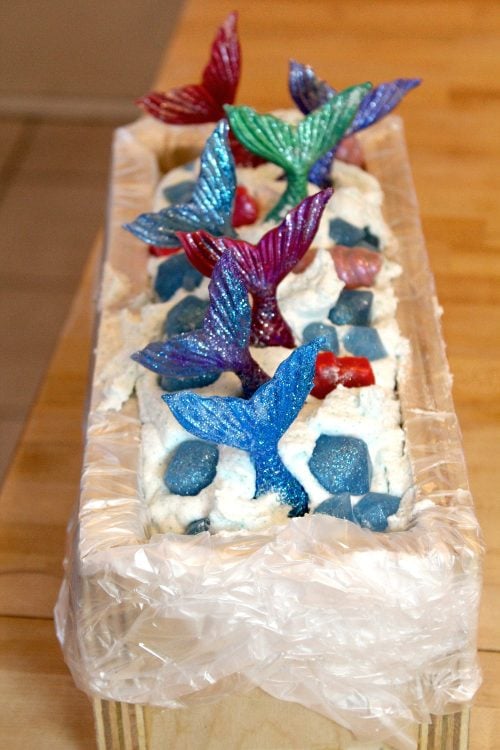
Once you’ve applied your soap frosting, you can add your mermaid soap tails and other soap elements into the “sea foam” frosting.

Now carefully remove your soap loaf from the mold. You may need to slice your soap bars right away depending on what you used for frosting. If your frosting is going to fully harden, you’ll want to slice your loaf before this happens.
If for some reason your soap frosting doesn’t like your ocean soap loaf enough to stay attached to it once hardened, you can melt a small amount of clear melt and pour soap base to use as “glue” to reattach the two elements back together.
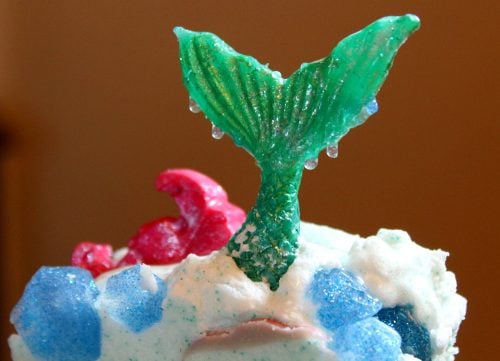
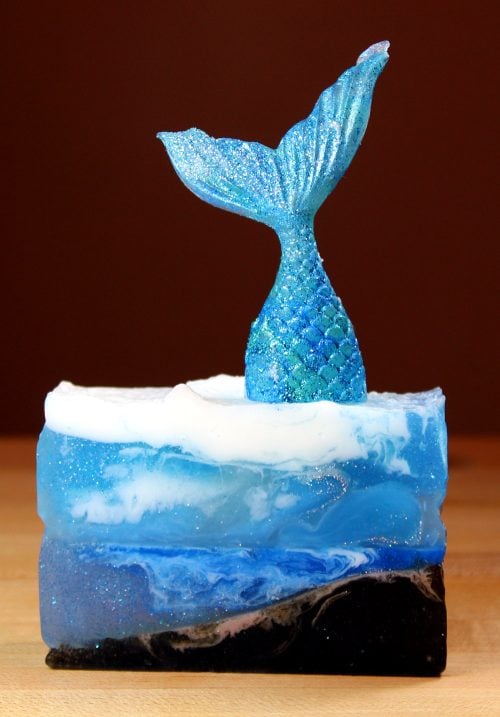
If desired, you can also drizzle melted, but cooling, clear melt and pour soap base over the tops of your finished soaps. This gives the appearance of water dripping off of the mermaid tails.
Your mermaid soaps are now ready for personal use or gifting to friends and family!
If you plan to use my mermaid soap tutorial to make soaps to sell, you’ll need to follow FDA guidelines for labeling your product. If you’re unsure about the rules and regulations regarding labeling soaps and cosmetics, I highly recommend the book, Soap and Cosmetic Labeling: How to Follow the Rules and Regs Explained in Plain English, by Marie Gale.
If you’d like to buy a bar of mermaid soap rather than making your own then be sure to check out this beautiful goat milk mermaid soap from Harper’s Bath Time on Etsy (pictured above.)

As well as this glycerin mermaid soap from Paradise Skincare (as seen above.) Leeloo’s Soap also sells a rather whimsical mermaid soap. For even more homemade mermaid soaps you can buy, visit Etsy here.
If you’d like to discover even more homemade soap recipes and soapmaking tutorials like this one, be sure to follow my boards on Pinterest. You can also find and follow me on G+, Tumblr, Facebook, Twitter, Blog Lovin’, and Instagram for behind the scene sneak peeks. Or sign up to receive new posts to your email via FeedBurner so you never miss a post.


4 Comments
Susan
April 7, 2017 at 3:32 pm
This is a wonderful tutorial and a really cute project. Love it!
Rebecca D. Dillon
April 7, 2017 at 5:13 pm
Thank you so much! I’m glad you like it!!
Debbie
October 11, 2017 at 12:39 pm
These are gorgeous! How do you wrap them so the tails don’t break off?
Rebecca D. Dillon
October 11, 2017 at 12:44 pm
Thank you! I didn’t wrap mine, simply gifted them as they were. However you could use foodservice film or shrink wrap. A clear plastic box may work as well if you can find the right size. Someone else may have suggestions or tips that have worked better for them. I’ll pose the question on my facebook page here.
Comments are closed.