
Alcohol Ink Ornaments DIY (Video Tutorial for the Holidays)
Alcohol ink ornaments are not only a beautiful way to decorate your Christmas tree or winter wreath, they’re also incredibly quick and easy to make. Keep reading to learn how to make your own DIY alcohol ink ornaments. Plus a fun video tutorial on how to make alcohol ink ornaments from my fellow friend, artist and teacher, Hillary Hardison.
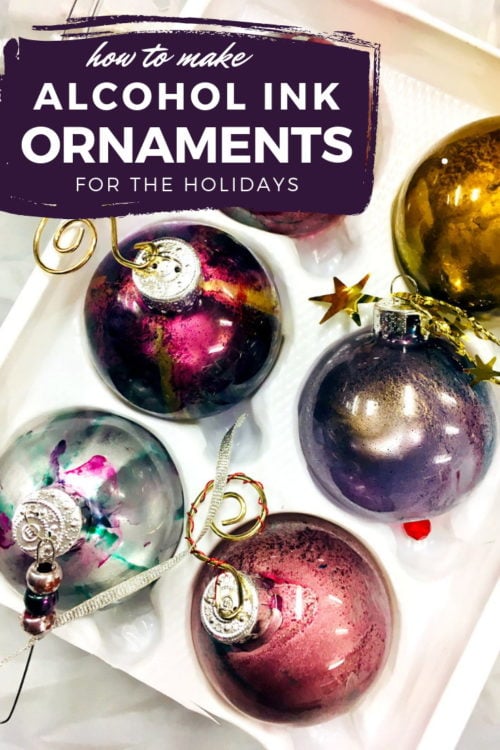
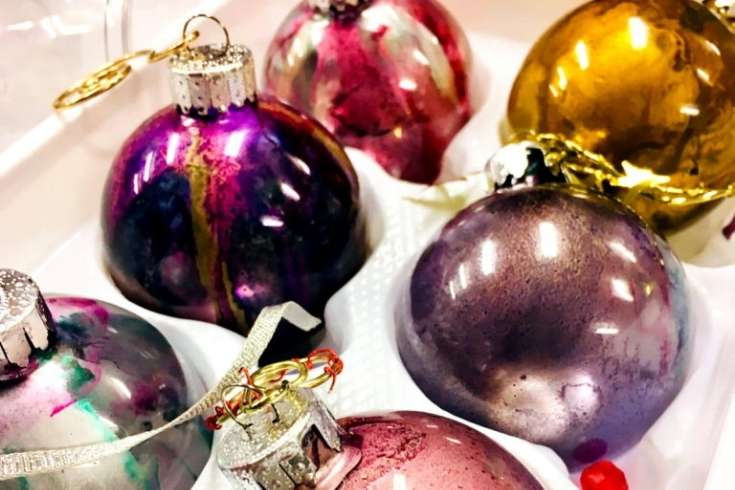
Alcohol ink ornaments are so beautiful. So I assumed they would be a challenge to make. I was SO wrong. Truth be told, you can actually make your own DIY alcohol ink ornaments from start to finish in just 10-minutes or less. So if you block out just an hour or two over the weekend, you can create a dozen of your own unique alcohol ink ornaments for your Christmas tree or winter holiday wreath.
Not only will these handmade ornaments make your Christmas tree pop, they are also perfect to give as last minute holiday gifts. Simply customize them with the year or a family name using a paint pen for an easy keepsake ornament that can be treasured for years to come.
My friend Hillary locally teaches a once monthly class dubbed Wine & Art Wednesdays. She’s been teaching these classes for some time now. Her latest class, however, was the most popular ever!
For this class she taught a sold out crowd how to make alcohol ink ornaments. Hillary was kind enough to allow me to video the process for my readers so you can also join in the fun! Keep reading for written instructions on how to make DIY alcohol ink ornaments. Then be sure to watch Hillary’s video tutorial (from her class) on how to make alcohol ink ornaments at the end of this post.
How to Make DIY Alcohol Ink Ornaments
Supplies & Materials:
Alcohol Ink, In Colors of Choice
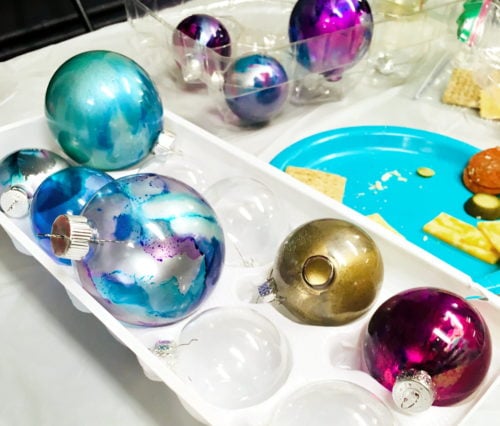
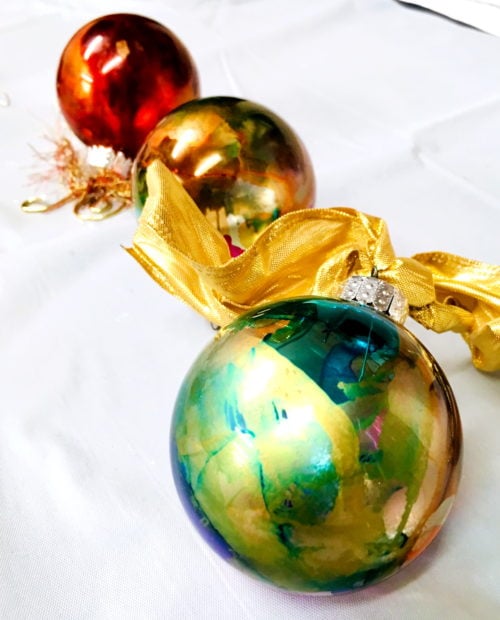
Clear Glass Ball Ornaments
Compressed Air Duster
Ribbon, Beads & Hooks, optional
Tips & Tricks:
You do need non-porous ornaments for this project. That means no plastic. Therefore, clear glass ornaments, like those found in craft stores, are perfect for making alcohol ink ornaments.

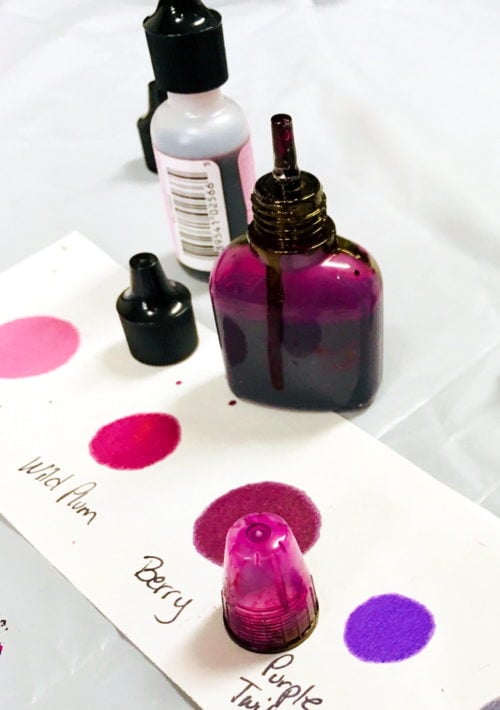
If desired, you may want to create color cheat sheets for your alcohol inks. Simply add a drop of each of your colors to a strip a paper. Then label the colors used. This helps you know exactly what the colors are going to look like out of the bottle as so many colors appear much darker while bottled.
Additionally, it’s important to know that unlike paint, alcohol inks do not blend with one another. So mixing two colors together inside of your ornament will actually cause the colors to push away from one another rather than combine.
Also keep in mind that less is more. You really only need a small amount of alcohol ink to coat the inside of your alcohol ink ornaments. However, there is a fix should disaster strike.
One of Hillary’s students ended with a small pool of ink in her ornament once she’d achieved a design she liked. To remove the excess ink, she thinly rolled up a small section from a paper towel. She then dipped the paper towel into the ornament to soak up and remove the excess ink from the bottom of her ornament.
Instructions on How to Make Alcohol Ink Ornaments:
Cover your workspace with a plastic tablecloth or paper to protect your work surface. If desired, you may also want to wear gloves and a craft apron to prevent staining clothing and skin. If desired, do as we did and pour yourself a glass of wine. And grab a friend too! They always make everything more fun.
Once you’ve gathered all your materials, you’ll begin by simply diving in! Take a sip of wine, cock a grin at your BFF, then ready your gun – er, compressed air. (Just don’t shake the can!)
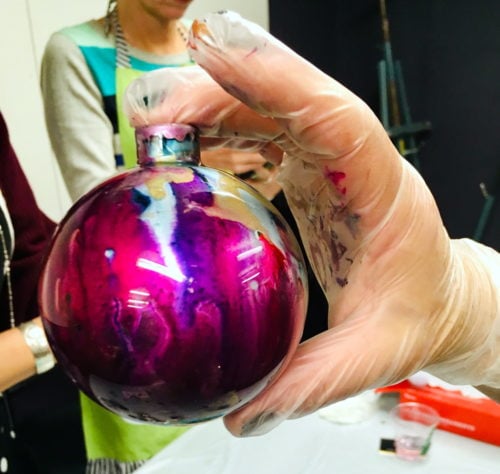
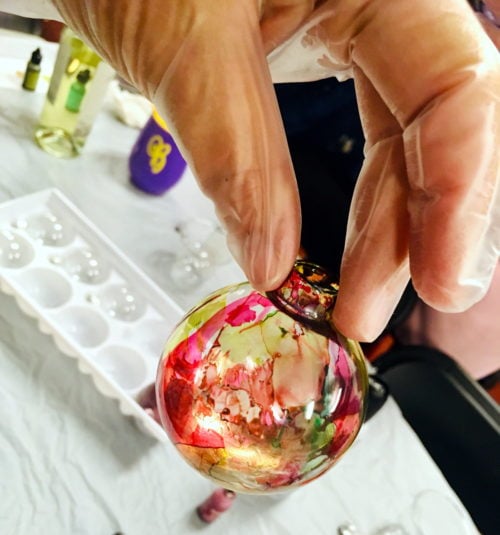
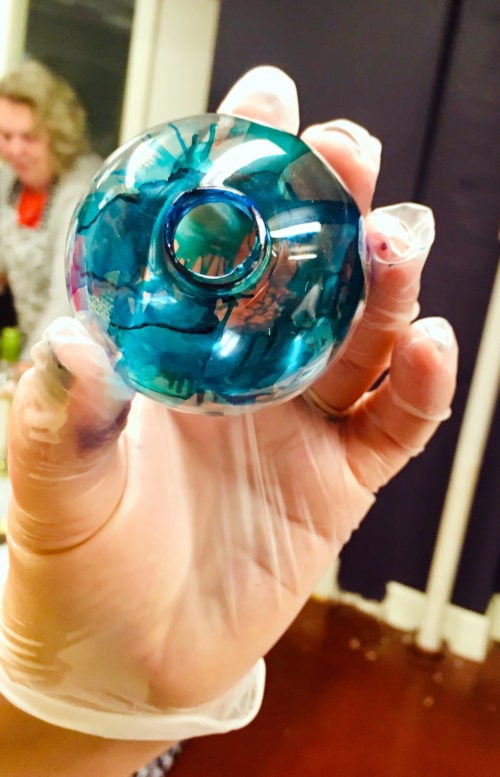
Remove the top from a glass ornament. Now add a small amount of alcohol ink to the inside of your ornament. Using the compressed air, you’ll then spray air into the ornament in short bursts. You can direct where the ink goes by simply aiming the air in different directions.
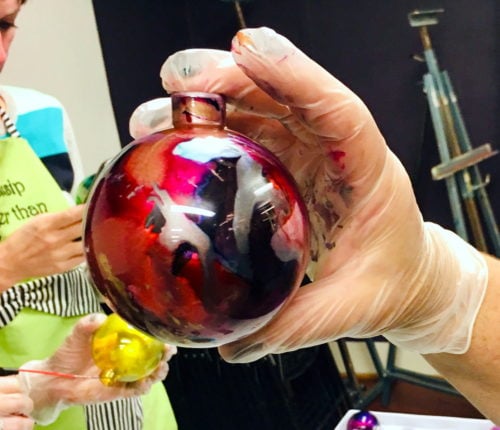
Now add your second color and repeat the process. (Keep in mind, however, that the ink for alcohol ink ornaments dries very quickly.) Continue adding ink and air until you get the look you’re after. As there really are no rules, feel free to experiment your heart out!
Discover design ideas for your DIY alcohol ink ornaments here.
Place your finished alcohol ink ornaments back inside the carton they came in, or in another safe location, so they don’t accidentally roll off the table and break. (Wait.. did I suggest drinking wine and playing with glass at the same time? Whatever. You’re a grown ass woman. You’ll be fine.)
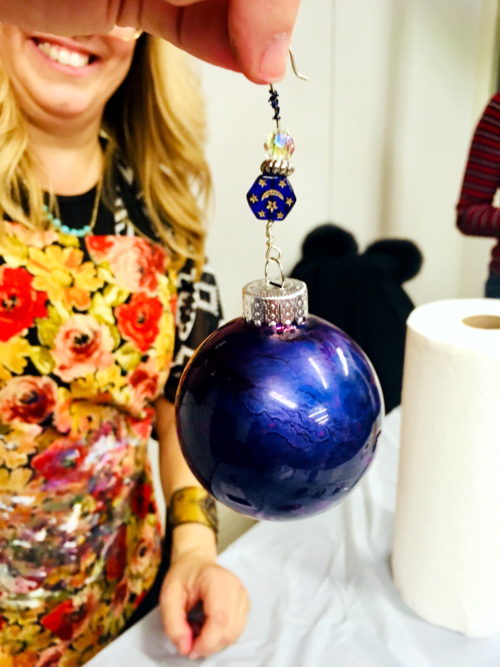
Once your DIY alcohol ornaments have dried completely, reinsert the tops. You can then add hooks to your ornaments and decorate them with beads or ribbon as desired.
Now, without further ado, Hillary’s awesome (and unedited) video tutorial on how to make alcohol ink ornaments! (I love this woman!)
To learn more about Hillary and her work you can find her on Facebook and via her website. Or, if you’re local or plan to visit the Roanoke Valley, you can find a schedule of events at the Aurora Artisans Studio & Frameshop here.
For more winter holiday ideas & crafts, be sure to check out this Pinterest board. Or discover more holiday DIY’s on the blog here. Also, don’t forget. If you’ve made a project from a tutorial or recipe on Soap Deli News, I want to see it! Simply tag your photos with #soapdelishowoff on instagram.


6 Comments
Adrianne
November 19, 2019 at 3:53 pm
Mine are very faint. Do I need to add more ink?
Rebecca D. Dillon
November 20, 2019 at 10:17 am
I would. Or it could be the color of the ink itself. It’s easy to go back and add more.
tc pavlenko
November 26, 2019 at 5:55 am
compressed air like the air I use to clean computer keys of dust etc?
Rebecca D. Dillon
November 26, 2019 at 8:25 am
Yes, exactly like that.
Katie
December 15, 2019 at 9:45 am
How long should they dry on between layers?
Rebecca D. Dillon
December 15, 2019 at 9:57 am
They dry rather quickly. If you are using a small amount when you add color, they dry in 30-60 seconds.
Comments are closed.