
Spooky DIY Halloween Decorations: Fun Family Craft Project
Learn how to make spooky DIY Halloween decorations inspired by the intro of the horror series, American Horror Story. This clay craft project is perfect for families to enjoy making together. Discover how to use air dry clay, paints and a sealer to create creepy body parts and other dead things to “embalm” inside your collection of mason jars. Both adults and kids will enjoy the creative process almost as much as scaring their friends at that upcoming Halloween party!

DIY Halloween Decorations
I loved the first season of American Horror Story which airs on FX. Although I did find the final episode of Season One to be a bit of a disappointment. That said, the intro to this series was solidly done and appropriately creepy.
Loving how frightening the basement in the intro looked, I thought it would be fun to create my own creepy preserved jars full of body parts. The ones that you see in the basement in the opening credits of the first season. Yes, it’s a tad perverse. However, I also thought it would be a fun switch from making pretty homemade soaps and beauty recipes.
Therefore, my son and I created this clay craft project together. We had a blast making these. Plus, we simply can’t wait to put these jars to use once Halloween rolls around. Not only do they make unique DIY Halloween decorations for your own haunted house, but it’s also a great family Halloween craft project.
Continue reading to learn how to make these creepy mason jars filled with fake preserved organs to decorate your home for Halloween!

Halloween Family Crafts
If you’re looking for unique ideas for DIY Halloween decorations, this clay craft project will take your Halloween decor to the next level! Not only is it fun to make, but it’s also a great family craft project. As there are multiple steps, it’s easy to get the kids involved. Whether it’s molding the clay or painting the finished pieces.
This fun family craft for Halloween will help inspire your household’s creativity! A unique way to create custom DIY Halloween decorations for your home, this Halloween craft is especially perfect for a window display, a haunted house or Halloween party decor.
Halloween Clay Craft Project
We used White Das Air Hardening Clay for this clay craft project to create our DIY Halloween decor.. I’d never used this type of clay before —I was going for whatever I could get that gave me the most bang for my buck — and did find it a little dry. It’s similar to what you might use on a pottery wheel. Therefore, I treated it as such and just kept a small container of water on hand to moisten the clay as needed. (If you’ve never thrown pottery on a wheel before, it’s commonplace to keep a bucket of water beside the wheel as the clay dries out as you work with it.)
Supplies and Materials
You’ll need several other materials and supplies in addition to the clay used for this Halloween family craft project. Following are the things necessary to complete these fun Halloween decorations for your next party:
- Air Hardening Clay
- Acrylic Paints
- Paint Brushes
- Paint Palette
- Cup of Water
- Clear Acrylic Sealer
- Mason Jars
- Wine or Other Liquid
- Creativity

How to Make Halloween Decorations with Clay
Are you ready learn how to use air dry clay to create unique and uniquely terrifying DIY Halloween decor for your home? Following are the steps need to recreate this fun family craft. This Halloween craft project is a great way to inspire your household’s creativity to decorate your home for the holiday season.
Here is how to make DIY Halloween decor using clay:
1. First, mold the clay into different shapes — something similar to intestines, a finger, a stomach, a rat. Or try your hand at an alien type leech fetus thing similar to what my son came up with.
2. After you’ve molded the components that will used inside the mason jars for your Halloween decorations, set the clay aside to dry. I recommend that you wait at least 24 hours. However, you may need more time if your clay objects are especially thick.
TIP: Turn the sculptures over halfway through drying so they dry more evenly.
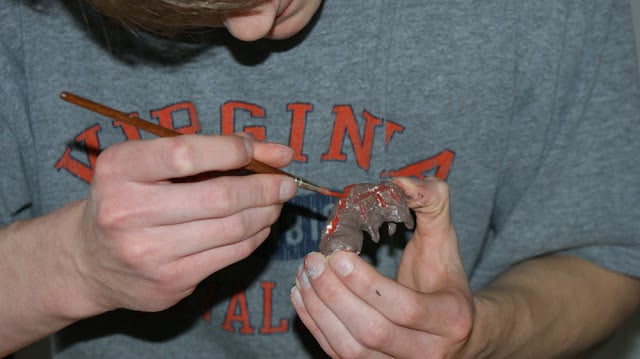
3. Once the sculptures dry, paint them with acrylic paints. Since we were going for dead, preserved body parts, we stuck to the colors white, gray, black, brown, and red.
I already had some white paint on hand. So, we simply bought black and brown and mixed them to get different shades. For the dark reds, I mixed some red iron oxide I had on hand in with the white paint.

4. After you paint the clay sculptures you designed for you spooky Halloween decor, set them aside to dry.
The clay objects we created dried fairly quickly. Which was a nice twist. It seemed like the clay basically sucked the moisture out of the paint. This enabled us to handle them in short amount of time. As a result, we were able to paint all of the sides rather quickly.
Pictured above is Cody’s stomach organ, which we thought sort of also looked like a kidney. But we weren’t really going for accuracy since this Halloween craft project was for fun, not necessarily realism.

5. When the paint on the clay object has dried, spray the sculptures with a clear acrylic sealer on all sides. I used two coats of sealer as we planned on immersing the final product in a liquid. (The liquid gives these elements the illusion that they’ve been embalmed in mason jars. I mean, how much creepier can you get?)
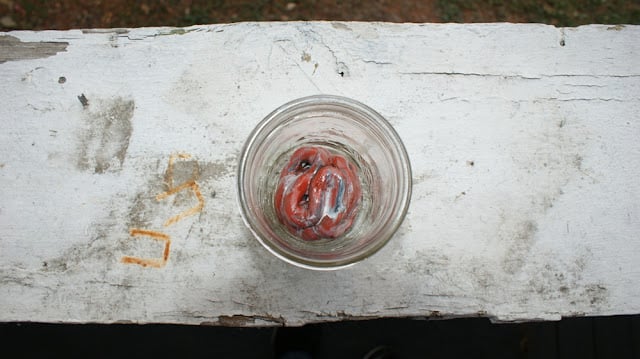
6. Once the acrylic sealer dries, place the faux organs into mason jars to create Halloween home decor.
I bought the half pint jars from the grocery store since as they cost less and I was on a budget. Ideally, you should have a mix of different size jars and containers to add to the intrigue.
Our clay rat wouldn’t fit into the smaller canning jars, and we didn’t want to make him smaller and risk ruining him. As a result, he was randomly set out among the jars when we decorated for Halloween.
TIP: If you don’t want your clay sculptures floating or moving around inside the jars — or you want one particular set view — you can glue them into the jars using E6000 glue.
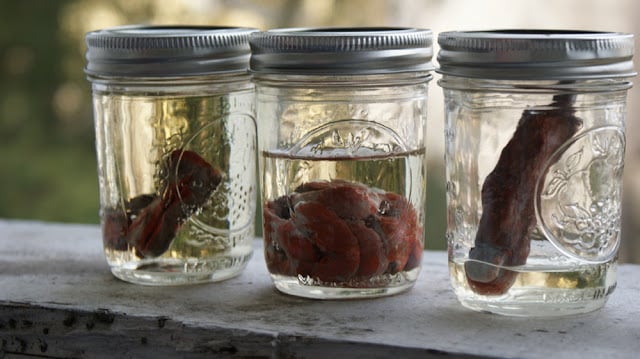
7. Choose a liquid to mimic the formaldehyde or embalming fluid in the mason jars.
Cody and I played around with different liquids to use for the formaldehyde. In the end, we settled on a white wine that had been sitting opened, but corked in my fridge for the past two months. (You can also use leftover wine to make wine soap recipes.) It looked great and gave just the effect we were looking for.
If you don’t have any wine that needs to be tossed, you can generally find really cheap wine at the grocery store on the bottom shelf. I’ve seen wine there for $3-$4 a bottle that can be used to complete this family Halloween craft project.
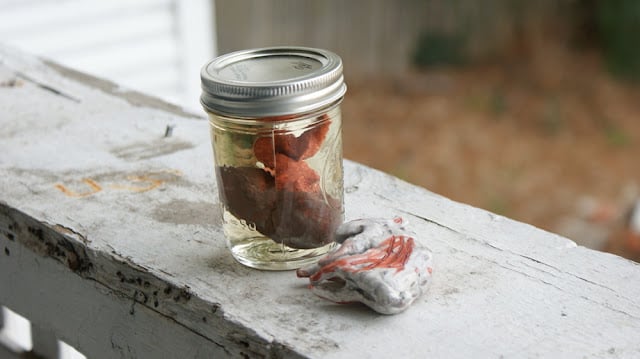
8. Next, fill each of the mason jars with wine to the level of your liking. You can fill them up to the top or half way. We varied our wine levels for visual interest when making our DIY Halloween decorations.
9. Finally, all that’s left is to tightly screw the lids onto the jars.
TIP: If desired, you can also print out poison apothecary labels for your jars. You can find free printable Halloween labels here for this purpose.

Cody and I were pretty pleased with the end result of our Halloween family craft project. Our jars looked super creepy down in my basement. My basement is half brick wall with no insulation and half dirt dug out from under the house. (My apartment is the lower level of a house that’s over a hundred years old.)
Since there’s no type of heating or cooling in the basement — it has a separate entrance from the house — the wine works perfectly. Due to the temperature, it’s less likely to freeze and risk damaging the jar or sculpture from the expansion. In any case, I recommend leaving some space at the to of your mason jar and clay Halloween decorations in order to account for the possibility of this occurrence.
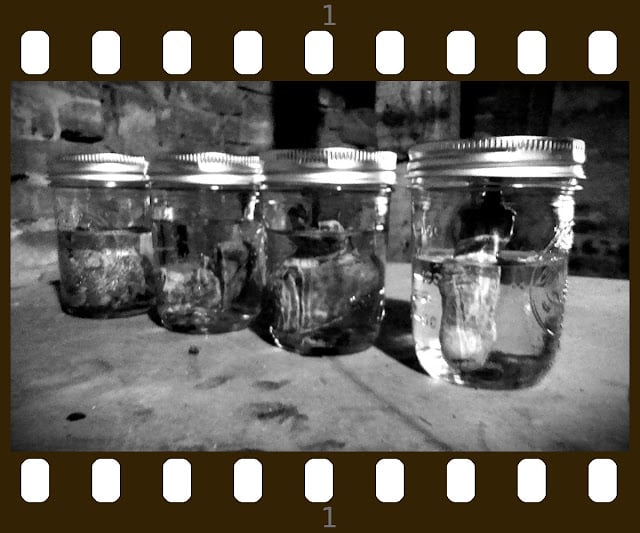
Here’s a grainy black and white of the jars in my basement taken via my camera phone. If and when I move, I think it’d be a lot of fun to leave these in the basement just for that what in the $#@! is this?! shock factor. (Update: I moved some time back and I DID leave these behind.)
All in all, this definitely made for a fun family project when you want to make DIY Halloween decorations together. It’s a great way to enjoy one another’s company, reduce screen time, and simply bond with your family.
I hope you enjoyed this spooky Halloween home decor idea made with clay. For more ways to decorate for Halloween, be sure to follow Soap Deli News on Facebook, Twitter, and Instagram.




7 Comments
William
February 12, 2013 at 9:43 am
Very very cool idea being a bit of a horror lover myself this will be a fun project to scare the neighborhood kids with on Halloween. Even go as far as filling a container with faux eyes and tell the kids in a creepy voice “these guys here just love to SEE whose coming” Muhahaha. Thank you for the wonderful idea!
Season 2 of American Horror story was very well done, telling the story on the origins of the characters who appeared in the first season and how they came to their fates and what is in store for them in the future. Definately worth seeing but watch it closely or you can get lost somewhat easily..
Adrianne at Happy Hour Projects
February 12, 2013 at 12:04 pm
Okay, awesome work, because they look totally gross!! What a great idea for Halloween!!
Tiffany Barry at In a Pretty Box
February 12, 2013 at 1:04 pm
Creepy yet awesome!!
Ashley Travers
February 12, 2013 at 1:20 pm
I love that show – the second season was way to weird for me, but these are very cool! They kind of creep me out even though I know what’s in them isn’t ‘real’. Good job!
Sherry Clarke
February 14, 2013 at 5:45 am
I liked that show too, although I only saw a few episodes. This are so gruesome…I’m betting my son would get a kick out of making something like this. Thanks for a bit of freaky inspiration!
Morena Hockley
February 15, 2013 at 1:08 am
Wow, this is so cool in a gross kind of way. My boys would love this! I loved AHS first season (in spite of the lame finale) and was so excited about the second. The premiere of the second season was so bad that we didn’t make it past the first thirty minutes. It was campy and just bad. Maybe it got better, but we gave up on it.
Diana – FreeStyleMama
February 22, 2013 at 3:59 am
Funny & creepy!
Comments are closed.