Zombie Halloween Makeup Ideas for Your DIY Halloween Costume
Looking for Halloween makeup ideas for your Halloween costume? This DIY zombie Halloween makeup is the perfect choice! Learn how to craft your own homemade, non-toxic mineral makeup to accent your zombie Halloween costume. Then use what’s leftover as a cream eyeshadow for the rest of the year!

Zombie Halloween Makeup Ideas
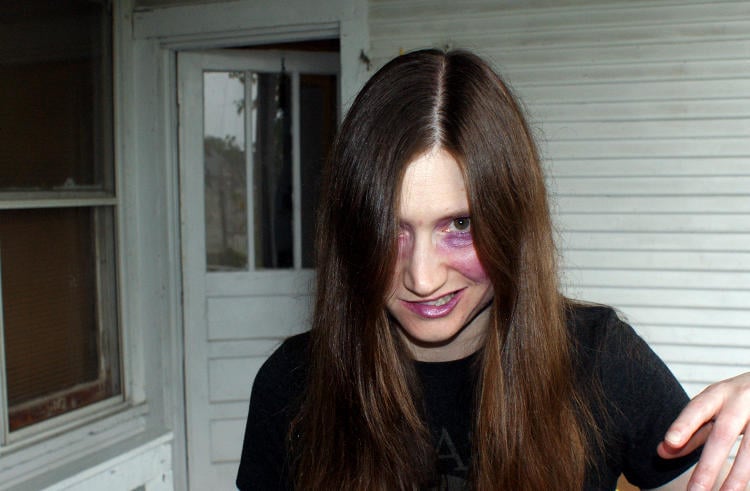
Looking for safe, non-toxic makeup ideas for your DIY zombie Halloween costume this year? Try out this simple zombie Halloween makeup recipe! You’ll learn how to make a natural purple colored, mineral makeup cream eyeshadow for your Halloween makeup looks.
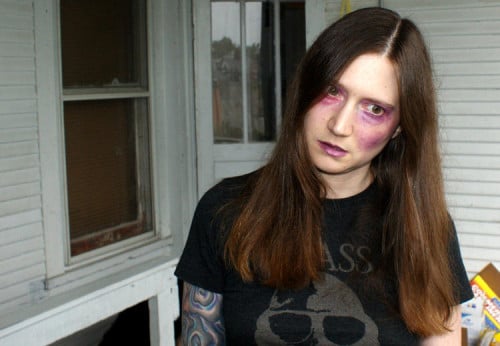
This easy zombie Halloween makeup DIY creates convincing bruises. It’s also perfect for giving your face the gathly look of death – the perfect Halloween makeup look for your ghost or zombie costume. You can even add a hint of shimmer just for your feminine side. Don’t want the shimmer? Simply omit the mica powder called for in my zombie Halloween makeup recipe. Then, once Halloween is over, continue to use this awesome non-toxic mineral makeup recipe year round as a cream eyeshadow!

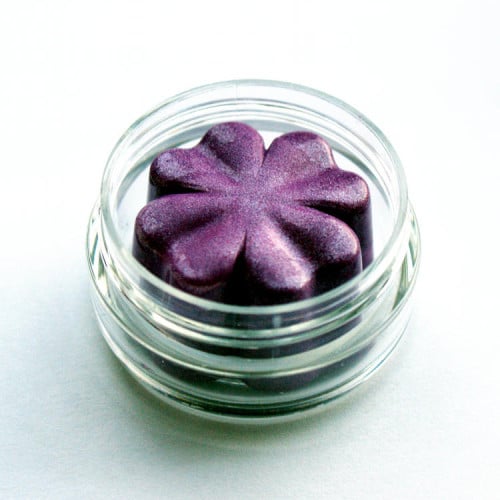
This DIY zombie Halloween makeup recipe makes six non-toxic, mineral cream eyeshadows. So not only can you give yourself the perfect Halloween makeup look, you can share it with your friends too! You can also halve this mineral makeup recipe to make less of the product, if desired. Then use it on eyes and lips to perfect your custom “dead” zombie Halloween makeup look!

Zombie Halloween Makeup Recipe
© Rebecca D. Dillon
Ingredients:
14 grams white cosmetic beeswax
28 grams 76 degree melt point coconut oil
8 grams grape seed oil (or castor oil)
10 drops Vitamin E oil
10 drops rosemary extract
1 gram lip & eye safe matte lavender ultramarine pigment powder (or African violet matte pigment powder)
8 grams matte pink orchid ultramarine pigment powder
1 gram lip & eye safe silver mica powder
Tools & Supplies:
digital kitchen scale
plastic transfer pipettes
six – 10g (1/3 oz.) lip balm pots with lids
silicone chocolate flower mold
mixing utensil (a butter knife works great!)
Instructions:
This zombie Halloween makeup recipe is basically the same as my Natural 2 in 1 DIY Lip Stain and Cheek Color Recipe, but calls for different pigments and amounts to give you a bad boy bruise purple. Layer and use more for a deeper, more intense purple. Use less for a lighter shimmering purple. This also makes a great base for helping your powder eyeshadows stick longer.
Use a digital scale to weigh out the beeswax, coconut oil, grape seed oil and mica.
Start by weighing out the beeswax in a glass pyrex measuring cup, then heat the beeswax in a heat safe container. You can either use a double boiler. Or heat in a microwave at 30% power until melted. Then carefully remove from microwave using a potholder or kitchen towel.
Next, stir in 28 grams of coconut oil. If mixture starts to solidify, place the mixture back in the double boiler. Or gently reheat in the microwave at reduced power more until all ingredients have full melted.
Now weigh out the grape seed oil and stir into the wax and coconut oil mixture.
Using a plastic transfer pipette, add ten drops of vitamin E. Repeat with the rosemary extract using a new pipette to prevent cross contamination.
Finally weigh out the pigments and mica powders and stir into the cream shadow base. Mix well, then slowly pour the base equally into six (or seven) of the flower shaped cavities of your silicone mold. (Or simply pour into the lip balm pots if you don’t wish to mold your makeup.)
Allow your Halloween mineral makeup to harden completely. Then remove each flower shaped shadow from the mold and place into each of your six lip balm pots and cap.

Allow your mineral makeup eyeshadow to harden completely – this generally takes about a day – before using for the best results. Then using a sponge or your fingertips, apply your zombie Halloween makeup under eyes, on eyelids, around cheekbones and on lips! Or customize your Halloween makeup look and apply it anywhere you like! Go wild and blend a bit of red eyeshadow in with the purple under an eye to make your face look even more distressed. If needed you can help set your look with a light dusting of translucent powder.

Love this Halloween makeup idea? Be sure to pin it for later!
For more DIY Halloween projects like this one, be sure to follow my Halloween Ideas Pinterest board. Or shop for fun, Halloween inspired costumes, makeup, soaps, bath bombs and more via my collection of Halloween favorites on Etsy.


4 Comments
Priyanjana Roy
September 26, 2013 at 1:49 am
nice and natural
😀
Alli
September 26, 2013 at 7:19 am
How great that you made your own zombie makeup! Love it!
Tiffany Barry
September 27, 2013 at 1:28 pm
Just the right amount of makeup! We’ve got small children, so this is the perfect amount to have on without scaring them to death! 😉
Emma kingdon
September 27, 2013 at 7:11 pm
Love the idea but a bit of blue black and gray would be nice also
Comments are closed.