How to Make Pumpkin Spice Massage Candles for Fall
Learn how to make unique DIY pumpkin spice candles. Formulated for both aromatherapy as well as fall skin care, these homemade massage candles don’t just scent the room. They also doubles as a massage lotion for skin. Scented with a fabulous pumpkin pie spice fragrance oil, this easy DIY craft is a great way to start enjoying those fall vibes.

Easy Massage Pumpkin Spice Candles for Fall
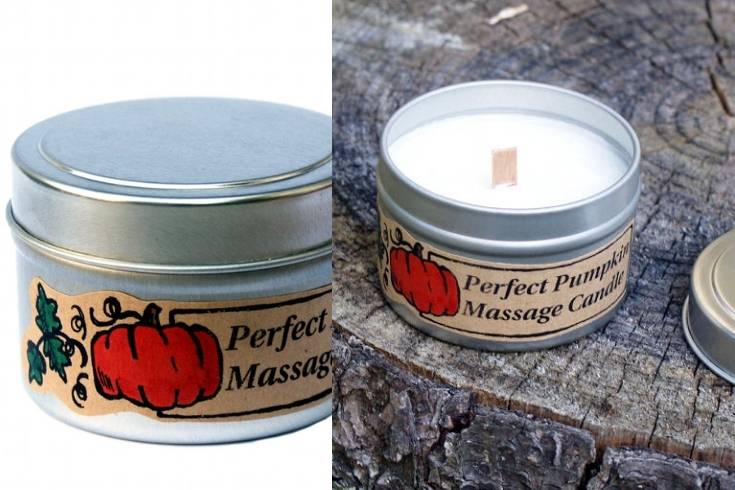
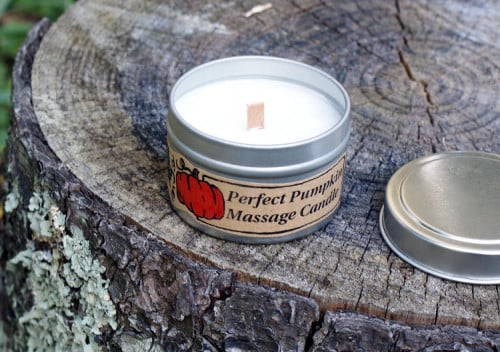
Create the perfect homemade gift for fall with this easy pumpkin massage candle project. Not only does this DIY candle scent the room with the mouth watering fragrance of pumpkin pie, but you can massage the melted wax onto your skin. The melted wax in this homemade massage candle works just like a lotion! So, it’s an ideal autumn product that provides a two-in-one solution for pumpkin spice season.
Keep reading for my easy pumpkin spice latte scented, massage candle recipe. Not only do I guide you through the process of how to make massage candles in your scent of choice, but I’ve also created free printable pumpkin labels for your personal use. These cute candle labels work perfectly for candles made in glass jar or tins. The cute pumpkin design ties the entire fall project together. It also helps you create the perfect homemade gifts for fall!

DIY Pumpkin Spice Candles
© Rebecca D. Dillon
Massage candles are a fun and easy fall craft to create for this time of year. I love how they’re a two-in-one solution for products you regularly use. Of course, I also can’t resist the classic fall scent of pumpkin pie made with pumpkin spice! This DIY candle project has it all. Made with three simple ingredients, this easy candle recipe is a great way for beginners to make their own products at home.
This massage candle recipe yields one 4 oz. candle. However, with the minimum purchase of materials you purchase — 1 lb. soy wax, 2 oz. fragrance oil, 12 oz. shea butter, 10 wooden wicks, and 10 metal tins — you can make about seven candles. If you prefer to use essential oil rather than a fragrance oil, use half the amount of a skin safe essential oil.
Feel free to double this candle recipe as needed to make more than one candle at time. In the meantime, you’ll find all the ingredients, tools, supplies and materials you need to make homemade massage candles below. I can’t wait to see what you come up with!
Ingredients:
These are the ingredient necessary to make massage candles:
- 65 grams soy wax
- 10 grams refined shea butter
- 4 grams carrier oil, such as sweet almond, fractionated coconut or jojoba oil
- 2 grams Perfect Pumpkin fragrance oil (this amount is based off the usage rate for a body lotion application for this specific scent)
Packaging Supplies:
In addition to the ingredients called for in the candle recipe, you will also need the following supplies to package your DIY massage candles:
- Wood candle wick: It’s important to use a soft, small wooden candle wick for this project to avoid a fire hazard. Using a wick that is too large for the container can result in a high flame that’s unsafe. I once used a larger wick than was necessary. The outcome was less than pleasant with the flame setting off my smoke alarm the first time I burned it. If you are making these candles in a different size container or doubling the recipe, then be sure to check out this helpful post on how to choose candle wicks at Life-n-Reflection. (If you prefer not to use a wood wick, you can use any lead-free wick of your choice.)
- Candle container: I used a 4 oz. deep round tin with lid as the candle tin for this project. These containers come as is as well as in range of colors and designs. For an 8 oz. tin, simply double the massage candle recipe. If desired, you can use candle jars or heat tempered mason jars instead. Just be sure to use the correct size wick for the container and increase the recipe as necessary.
- Full Sheet Labels: If you aren’t using a decorative candle tin to make these homemade candles, then I’ve provided free printables that you can use. Simply print the labels onto kraft paper sticker label sheets. You can then cut out the labels and apply them to the container. Even if you don’t decorate the outside of the container, I do recommend that you add the safety sticker to the bottom. This is especially important if you plant to give these massage oil candles as homemade gifts.
Tools and Equipment:
Like most candle making crafts, you also need a few tools and some equipment to pull this project off. Here are the additional things you need to make this soy candle project:
- Scale: You will need digital kitchen scale
to weigh out the ingredients in the recipe. As this massage candles recipe is in grams, make sure your scale has a gram weighing capacity. Should your existing scale not have an optional to weigh out things in grams, you can convert the recipe into ounces. Then increase it as necessary.
- Metal utensil: You will need a metal utensil to stir the wax blend and mix in the fragrance oil. Nothing fancy is required here. A simple fork or butter knife will suffice.
- Glass pyrex measuring cup: You will need an 8 oz. heat safe, glass measuring cup with a spout to complete this recipe as provided. This is used to combine the ingredients as well as mix and pour them.
- Dropper or pipettes: As such a small amount of fragrance oil is called for to make these massage candles, I used a plastic transfer pipette
to assist with process. A dropper allows you to add a small amount of fragrance to the wax mixture to ensure you get the proper weight.
- Markers: Permanent colored markers
are optional and only necessary if you’d like to color the printable labels provided.
- Pot holder or kitchen towel: To avoid accidental burns, you will need a protective potholder or something similar to handle the container you use to heat the soy wax and shea butter used to make these candles.
- Microwave: I used a microwave to melt both the wax and the shea butter. Alternately, you may also use a double boiler.
- Scissors: Also optional, you will use scissors to cut out the labels to adhere to the candle tins.
- Printer: Should you choose to use the printable candle labels provided for this project, then you will need a home printer to print the labels onto full size sticker sheets.
- Thermometer: You will need a digital laser thermometer or candy thermometer to measure the temperature of the wax after it’s been melted.
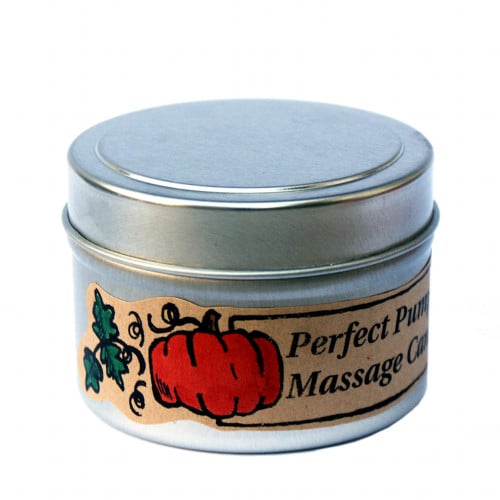
- Printable Perfect Pumpkin Massage Candle Labels: These labels can be printed to decorate the soy massage candle tins.

How to Make Pumpkin Spice Massage Candles
Here is an easy tutorial how to make spice pumpkin scented massage candles for fall.
Place Wick
1. Start by placing the wooden wick inside the metal tin then use scissors to cut the wick so it’s just a hair shorter than the tin. Place the wick inside the metal wick holder or base and set inside the middle of the metal tin.
Weigh and Melt Wax
2. Now, using a digital kitchen scale, weigh out the soy wax and shea butter inside the glass pyrex measuring cup. Heat in the microwave at 50% power until the wax and shea butter have melted. Carefully remove from the microwave using a pot holder or kitchen towel as the measuring cup will be hot.
TIP: For larger batches, I recommend using a pitcher designed for candle making and the double boiler method to heat and melt the wax.
Stir in Fragrance and Carrier Oil
3. Next, weigh out the carrier oil and stir it into the melted wax mixture. Allow the wax to cool to between 175-185°F before proceeding to the next step.
3. Once the massage candle mixture has cooled, place the container of wax and shea butter onto the digital kitchen scale and press tare. Using a plastic transfer pipette to slowly add the fragrance oil to the wax base, weigh out 2 grams of fragrance oil. Then stir with a metal utensil. I generally use a butter knife.
Hand Pour Hot Candle Wax
4. Now slowly pour all of the scented wax into the metal tin.
TIP: If the wick shifts, don’t worry. You can easily reposition it after you’ve poured the hot wax using a chopstick or similar.

Allow to Cool
5. Finally, allow the wax to cool completely then label, use or gift!
Label Your Pumpkin Spice Candles for Safety
Your DIY pumpkin spice candles should be labeled for safety, especially if you are giving these as DIY gifts. Therefore, I’ve provided free printable labels that you can use for this massage candle project.
You can download the labels for the pumpkin massage candles here.
The safety and caution label should go on the bottom of each candle. If desired, you can color in the labels with markers to give your candles a handmade touch or to express your own creativity.
How to Use Massage Candles
Once you’ve made these spiced pumpkin candles, allow 24 hours to pass before using. This ensures a better scent throw.
Before you use your candles, you also want to trim your wick to 1/4″ high before every use.
Light the pumpkin massage candle and allow the wax to melt and pool inside the tin. After you have a small pool of wax, blow out the candle. You don’t want to get burned by the flame.
Now dip your fingers into the warm wax. Massage the skin conditioning wax onto your skin like lotion to moisturize skin and give it a warm pumpkin spice fragrance.
If you like my recipe for pumpkin spice massage candles, then also be sure to try my cranberry massage candles. They’re perfect for winter holidays and make excellent DIY Christmas gifts. This candle project also provides additional insight into using other fragrances, as well as essential oils when learning how to make massage oil candles.
Looking for more ways to enjoy the scent of pumpkin pie this fall? This pumpkin salt scrub recipe uses the same pumpkin pie spice fragrance oil as these DIY candles. Formulated with nutrient rich pumpkin seed oil and real pumpkin seed flakes, this exfoliating DIY pumpkin salt scrub makes a lovely bath time treat!
For more DIY candle making projects like this one, as well as other homemade gift ideas for autumn, be sure to follow my boards on Pinterest! You can find Soap Deli News on Facebook, Twitter, and Instagram.


2 Comments
DesignedByBH
September 27, 2013 at 10:44 pm
What a perfect seasonal gift! 🙂
Priyanjana Roy
September 29, 2013 at 1:47 pm
I really like that , the melted wax can be used as well
Comments are closed.