Easy DIY Christmas Ornaments The Kids Can Make for the Holidays
Your family will love this easy Christmas decor idea for the holiday season. Learn how to craft these easy DIY Christmas ornaments with your kids for holiday inspired DIY Christmas decor this winter.

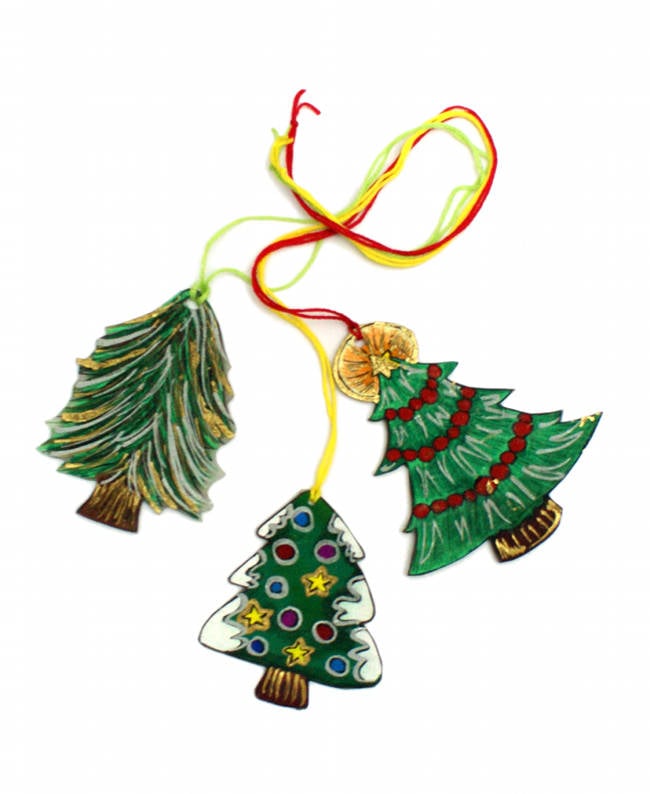
These easy DIY Christmas ornaments are made from shrink plastic Shrinky Dink paper. Not only will these ornaments look great on your Christmas tree, they make fun necklaces for kids to wear! Or give them as DIY holiday gifts for family and friends.

Fun DIY Christmas Ornaments for Kids
If you’re looking for fun winter activities for your kids for Christmas, then be sure to try this shrink plastic craft idea. It’s so easy to make DIY Christmas tree ornaments to decorate your Christmas tree for the holiday season with these fun homemade ornaments. Kids of every age – and adults too! – will love this winter holiday craft.
Learn how to make these easy DIY Christmas ornaments using Shrinky Dink Shrinkable Plastic to decorate your tree or wear as a necklace to get into the holiday spirit. You’ll find the tutorial for this Christmas decor idea below along with a free printable pattern to make your own Christmas tree ornaments for the holidays!

Easy DIY Christmas Ornaments
© Rebecca D. Dillon
What you’ll need:
Rough & Ready Shrinky Dinks Shrinkable Plastic
embroidery floss
kraft paper or parchment paper
cookie sheet or baking pan
markers and/or paint pens
colored pencils
hole punch
copy paper, optional
scissors
Instructions:
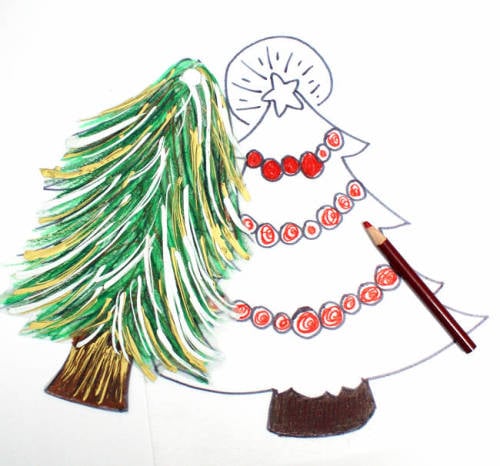
Begin by drawing out the Christmas tree shapes onto a plain sheet of copy paper until you get a design you like. Alternately you can search for Christmas tree clip art online. I drew all of my Christmas tree shapes free hand.
You’ll want your trees to take up anywhere from half to three-quarters of the page.
Now place one sheet of Shrinky Dink plastic on top of your design with the rough side up. Trace the outline of the tree with a marker.

Now use markers or colored pencils to color in the trees. I used Prismacolor Colored Pencils for their bold pigments and ability to blend easily. If you like you can use gold and silver paint pens to add accents to your trees once they are colored.

Now use a pair of scissors to cut out the Christmas tree shapes. Punch holes in the top of each tree using a hole punch, then place the shapes rough/colored side up on a baking or cookie sheet on top of either Kraft paper or parchment paper. Place in a preheated 350°F oven for approximately 3-3 1/2 minutes or until the trees have completely shrunk.
If your trees start to curl while in the oven, use a spatula to flatten them back out as they shrink.
Now remove your Christmas tree ornaments from the oven and allow to cool. Remove them from the baking sheet then thread embroidery floss through the holes at the top. Use shorter pieces of floss for ornaments or longer pieces of embroidery floss for Christmas necklaces. Alternately you could also use these as gift tags for your homemade Christmas gifts.

Now all that’s left is to enjoy your new creations!

If you enjoyed making these easy DIY Christmas ornaments using shrink plastic, then be sure to try my DIY alcohol ink Christmas ornaments. Another fun family activity for the winter holiday season, these DIY Christmas ornaments are quick, fun and easy to make. You can find the tutorial along with video instruction at Soap Deli News blog here.
For more easy DIY Christmas ornaments and ideas for your Christmas tree this holiday season, be sure to check out and DIY Christmas tree ornaments & inspiration Pinterest board. You can also follow my other Pinterest boards for homemade Christmas gift ideas as well as bath and beauty recipes and more.
For more seasonally inspired holiday ideas, be sure to follow Soap Deli News blog on Blog Lovin’, Facebook, Twitter and Instagram. Or sign up to receive my newsletter.


1 Comments
Marilyn
January 13, 2015 at 1:16 pm
I love the reindeer… How could I make that? Did you use a stamp?
Comments are closed.