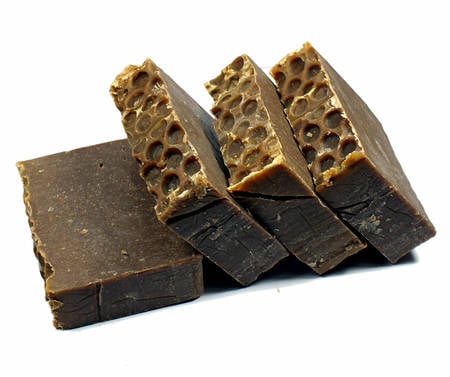
Handmade Natural Lemon & Basil Soap Recipe
 This all natural homemade cold process soap recipe is formulated to help fight acne without drying out combination skin. That this handmade soap smells so fabulous and invigorating – well, that’s just a perk!
Natural Lemon & Basil Soap Recipe
Ingredients:
1.8 oz. sweet almond oil
3.6 oz. hazelnut oil
7.2 oz. 76 degree melt point coconut oil
9 oz. sustainable palm oil
10.8 oz. olive oil (pomace is fine)
1.8 oz. safflower oil
1.8 oz. shea butter
4.9 oz. lye/sodium hydroxide
12 fluid oz. distilled water
.5 oz. lemongrass essential oil
.5 oz. basil essential oil
1 Tablespoon basil powder
1/8 teaspoon chromium oxide green pigment powder
Instructions:
To create this homemade soap you will need to follow your basic cold process soapmaking instructions. This soap recipe yields a 3 lb. batch – or 10-12 bars – and will fit inside one of my diy wooden loaf soap molds.
Start by lining your soap mold and taking all safety precautions. Then measure out the distilled water and place inside a large glass pyrex measuring cup or pitcher. Now, in a well ventilated area, weigh out the lye and slowly pour into the water. Mix until all of the lye is dissolved, then set the lye-water aside to cool.
Next, weigh out the shea butter and soapmaking oils and combine in a large non-aluminum pot. Place on the stove over medium heat until all the oils have melted. Remove from heat and set aside to cool to between 95 and 115 degrees F.
Once your lye-water and soapmaking oils have cooled, slowly pour the lye-water into the soapmaking oils. Use a stick blender to mix until your soap reaches trace. Now stir in the lemongrass essential oil, then slowly pour two-thirds of the soap into the prepared mold. Dust the top of the soap in the mold with the basil powder.
Next, add the basil essential oil and green pigment powder to the remaining soap in the pot and mix well. Pour this remaining soap on top of the lemongrass scented soap you already poured into the mold.
Finally, level the top of your soap if needed.. I generally level out the top of my soap with a butter knife by running the knife back and forth along the width of the mold to evenly distribute the soap, then running it back and forth along the length. However, you can use whatever method works best for you. Tap on the counter or table to release any air bubbles, then cover the soap and insulate for at least twenty-four hours.
Once the soap has completed the saponification process, you can unmold the soap and cut it into bars. {Learn how to make a soap cutting guide here.} Allow soaps to cure for 3-6 weeks, then wrap and label. (I use professional plastic food wrap film to wrap my homemade soaps, though you can wrap them any way you like.)
If you like this soap recipe, you may also enjoy my natural Tomato & Basil soap recipe. (It even comes with printable soap labels!)
Looking for a homemade soap recipe for oily skin? Then stay tuned to Soap Deli News for my upcoming Dead Sea Mud Soap Recipe! You can follow Soap Deli News via Blog Lovin’, Facebook or sign up for my once monthly email newsletter so you never miss a post. You can also find a collection homemade soap recipes from myself and others on my DIY Bath and Body board on Pinterest.


7 Comments
letitia loughridge
October 30, 2013 at 1:04 pm
mmm looks like it smells amazing!
Melissa @ Vandicrafts
October 30, 2013 at 10:46 pm
This is very interesting! I have never made soap but was always interested in how to do it. I think the one thing that does scare me is the lye (I have seen fight club! lol) Have you ever got it on your skin?
Rebecca D. Dillon
October 31, 2013 at 8:56 am
I have been splashed with it by accident when pouring. It stings, but nothing horrid. I just applied vinegar right away and it was fine. I imagine being doused in it would be much worse though so it is important to take safety precautions as it can cause serious burns especially when first mixed.
Megan
April 25, 2014 at 9:23 pm
Hi, I have a question on wrapping cp soaps with the plastic wrap you mention. Do you poke holes in the wrap to let the soap breathe or is it as necessary to leave the soap open to breathe after it has cured? I am still learning the packaging portion and have received different opinions on plastic wrap and would love to hear from you on this. I am going to make this soap tomorrow and can’t wait! Looks awesome! Thank you for all your help and wonderful recipes! 🙂
Rebecca D. Dillon
April 26, 2014 at 5:37 pm
It actually breathes through this particular film. I’ve used it for years and have never had any issues whatsoever with using it for cp soap.
Pamela
June 22, 2014 at 2:23 pm
Can I use fresh basil leaves in this soap? Thanks
Rebecca D. Dillon
June 22, 2014 at 3:28 pm
You could but you won’t get the basil scent from them.
Comments are closed.