
Starry DIY Snow Globe Ring & Homemade Christmas Gift Idea
This fun starry DIY snow globe ring not only makes a great conversation piece but it also makes for a brilliant homemade Christmas gift idea!

You don’t need a lot of skill for this DIY jewelry project but you do need a little patience to set the star on the ring base and allow sufficient drying time before you try to “shake” things up.
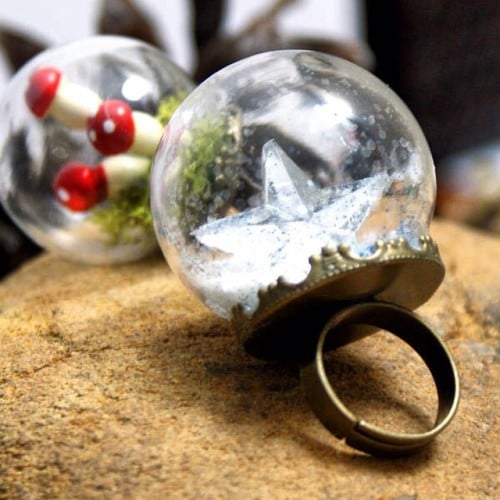
Starry DIY Snow Globe Ring
What you’ll need:
Large clear glass globe antique bronze ring (33mm diameter globe/25mm diameter opening)
washi tape (to hold star in place while it dries)
Tim Holtz Idea-ology Mirrored Stars (most craft stores have these)
E6000 glue/craft adhesive
fine colored glitter of choice
glitter snow
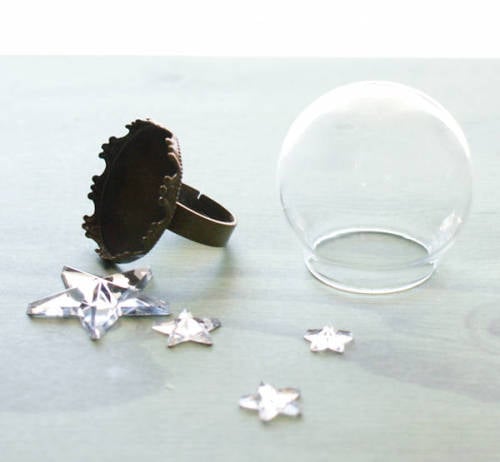
What you do:
I was not able to find the glass globe rings locally at any of the three craft stores in my area so I purchased mine online from Ingredients for Lovely on Etsy as she’s based in the USA.
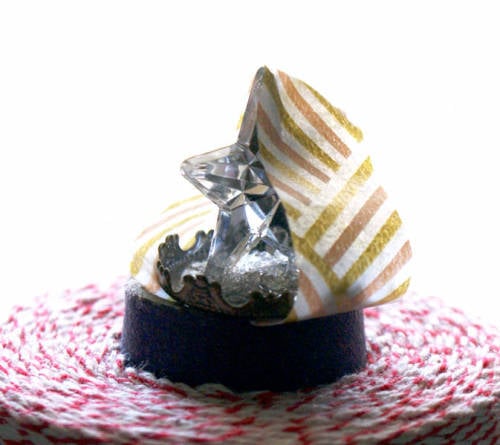
Begin by putting a small amount of E6000 glue inside the base of the ring avoiding the edge around the diameter. Dust lightly with glitter snow then place one of the largest of the stars from your mirrored stars pack in the very center of the ring base. Hold in place then gently apply washi tape to the ring to keep it standing straight up and down while it dries. Pop your ring into cone of baker’s twine or whatever’s handy to hold the ring up and keep it from falling.

Once the glue has dried carefully remove the washi tape. Apply more E6000 glue around the base of the star then sprinkle with more glitter snow. This will help to stabilize it further so it doesn’t come loose during wear.

Now add two or three of the smallest mirrored stars to the inside of the glass globe along with some glitter snow and a tiny bit of colored glitter. I used a fine blue glitter.
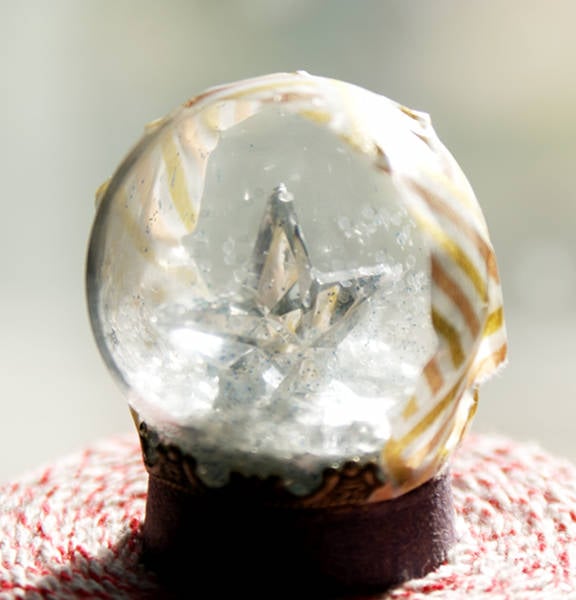
Now add a small amount of E6000 glue around the opening of the glass globe and press it onto the ring base. Wrap washi tape around the globe and onto the ring base to hold the two pieces together. Allow to dry completely.
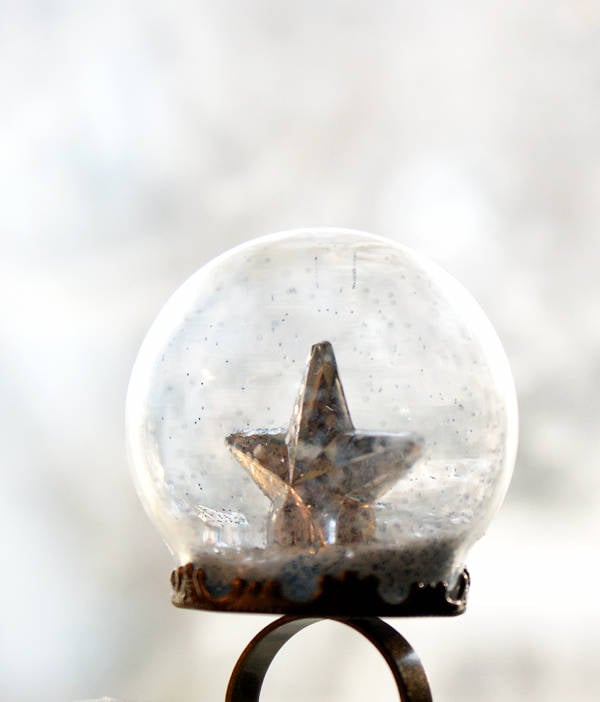
Once the glue has fully dried carefully remove the washi tape. And it’s done!

Now all that’s left is to wear your creation! Shake it up to see the snow flutter and cling to different parts of the star and glass.
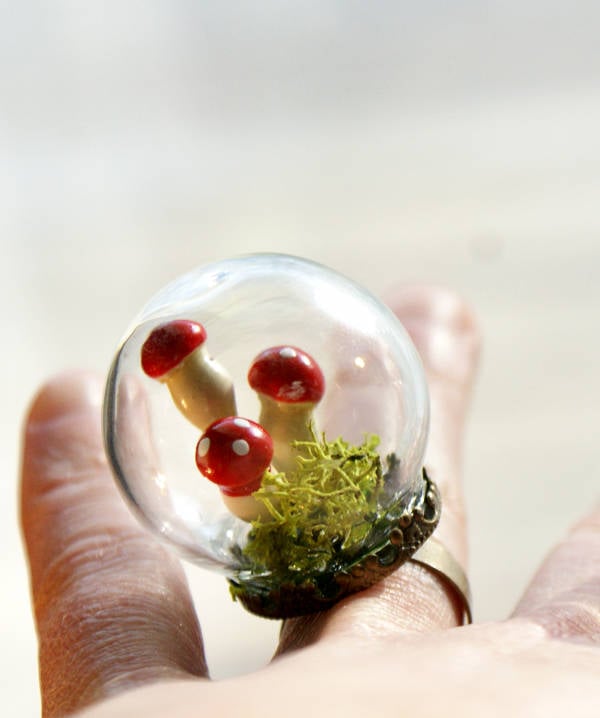
You can also use the same jewelry components to make DIY terrarium rings. For this mushroom terrarium ring I used three mushroom miniatures from the floral department of my local craft store. I simply twisted the bottom wires together and circled them together then glued them to the ring base with E6000. Once dry I also glued some preserved reindeer moss to the moss to cover the wires before gluing on the globe. You could always add glitter to this one too!

You can discover 50 more fantastic DIY Christmas gifts for friends and family at Soap Deli News blog here.
Or for more DIY projects like this one as well as homemade soap recipes and bath and beauty DIY’s be sure to follow my boards on Pinterest. You can also find me on G+, Facebook, Twitter and Instagram or follow me on Blog Lovin’ and Tumblr.

5 Comments
Bethany
December 9, 2014 at 5:32 pm
These are SO CUTE! LOVE!!!
Rebecca D. Dillon
December 9, 2014 at 7:02 pm
Thank you!
Heidi Fowler
December 10, 2014 at 1:39 pm
Such a fun idea! My kids would love it. Thanks for sharing.
Cassie from The Thrifty Couple
December 11, 2014 at 12:33 pm
I have never seen rings like this – what a cool project! Thanks for sharing!
Brittany Moore
December 12, 2014 at 12:42 pm
This. Is. Phenomenal! Definitely the most creative ring DIY I’ve ever seen! Pinning this one for later. Thanks so much for the inspiration!
Comments are closed.