Gummy Bear Soap DIY Using a Gummy Bear Soap Mold
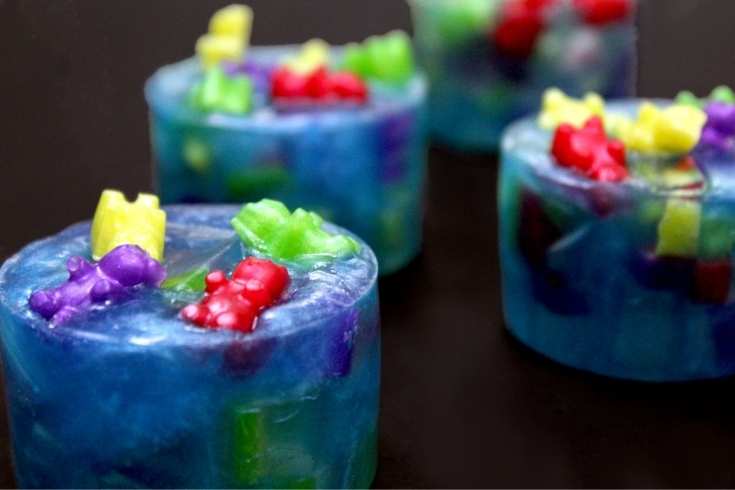
Learn how to make these fun, pool party DIY gummy bear soap bars using a regular size gummy bear soap mold and any other soap mold of your choice. This easy melt and pour soap recipe and tutorial makes a fun family project when you’re stuck indoors. Plus it’s easy to customize to create your own unique soap designs!

So, my son bought me an awesome Boozy Bears gummy bears kit this past Christmas. It came with a gummy bear mold and mixes for making cocktail flavored gummy bears in margarita, mojito and martini flavors. While I’ve yet to buy the alcohol I need to actually make these – it’s a future project, I swear! – I did finally use the mold. After all, a silicone gummy bear mold is, in essence, a gummy bear soap mold!
My initial idea was to make melt and pour soap cupcakes, topping them with soap icing and then sticking gummy bear soaps in the icing. I mean, that’s like the perfect party cupcake right? Unfortunately, I couldn’t find the icing tip I bought. And when I finally did, I still had fears of wasting supplies and failing miserably. (Which is crazy, right? Because messing up is how I’ve come up with some of my best ideas!)

However, I did buy an extra clear melt and pour soap base that I wanted to try. I’d heard and seen great soap crafting projects made with it. I figured I’d make a gummy bear soap DIY with the gummy bears embedded in simply a clear glycerin soap base. Two problems initially derailed this idea. First, I tried scenting it with orange essential oil. This turned the soap yellow. Therefore, it ended up being used as the base for my dandelion soap recipe. The remake, with lavender essential oil, was just cloudy. Unless of course I doused it with loads of rubbing alcohol just for photos. (Which I also couldn’t find.)
I wasn’t about to give up after two failed attempts, however. After all, the third time’s a charm. And from past experience, I know you can turn any soap making fail into a success. (Take this tea tree and sea mud melt and pour soap recipe for example.)
Seeing as how this gummy bear (soap) mold was initially meant to make boozy gummy bears, I figured why not give these little guys a pool party!
In the end my gummy bear soap DIY is more of a soap making tutorial than a soap recipe, as I rebatched the failed attempt and incorporated it into the final product. But, it’s a fun a project and it’s really hard to screw up an experiment. So have fun with it!
Read on to discover how to make DIY gummy bear soap using a gummy bear soap mold and another silicone soap mold of your choice. Plus learn how to create a gummy bear soap recipe with specific amounts to fit any mold of your choosing.

How to Make DIY Gummy Bear Soap
Because I rebatched my first attempt, this isn’t a straight up melt and pour soap recipe for making DIY gummy bear soaps. However, I do have the weights you’ll need for the gummy bear soap mold as well as the round silicone mold I used. (If you choose to use another mold to embed your gummy bear soap, then check out how to create a custom DIY gummy bear soap recipe further down.) Hopefully, this gives you a starting point if you want to full on wile out with your own gummy bear soaps.
Soap Needed to Fill A Gummy Bear Soap Mold
To fill an entire gummy bear soap mold (like this one) you’ll need 1 oz. (by weight) of melt and pour soap. Alternately, .1 oz. of glycerin soap base makes 5 gummy bear soaps. Easy peasy.
In addition to the gummy bear soap mold, I also used this round silicone soap mold. Each individual cavity in this soap mold holds 3.25 oz. (by weight) of melt and pour soap. Therefore, to fill the entire mold, you will need 26 oz. of soap. Of course, if you are embedding the DIY gummy bear soap into the soap in this mold, you should deduct the weight of the number of the gummy bear soaps used from this total.
Melt and Pour Gummy Bear Soap Tutorial
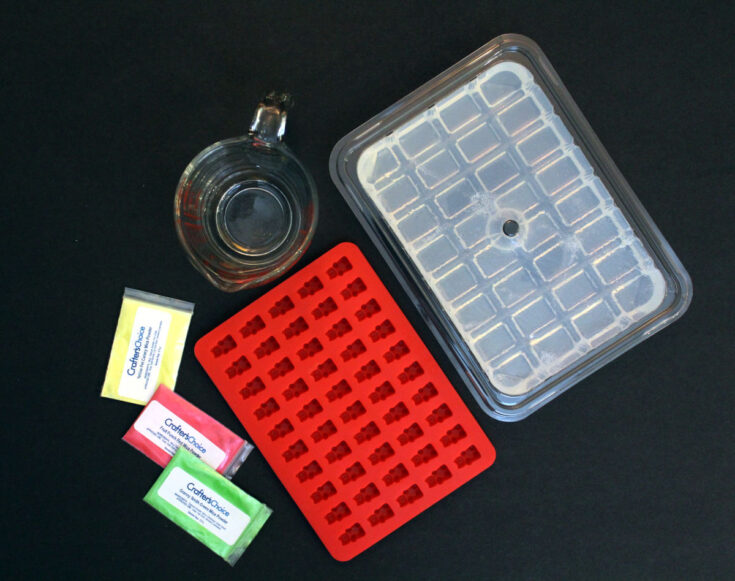
Ingredients:
Clear melt and pour soap base
Mica powder or melt & pour soap colorants
Fragrance oil or essential oil, of choice
Materials & Tools:
Gummy bear soap mold
Heat safe glass bowl or Pyrex measuring cups
Spray bottle filled with isopropyl alcohol
Microwave
Utensils
Digital scale
Cutting board
Knife
Directions:
To make different colored gummy bear soaps, you’ll need to make each soap color in batches. Once you decide on a color, you’ll also need to figure out how many melt and pour gummy bear soaps you’d like to make. To fill the entire tray with one color, you would use 1 oz. of soap. Alternately, .1 oz. makes five soaps.

Begin by cutting the clear soap base into chunks. Then weigh out the amount of soap you need to make the desired number of gummy bear shaped soaps.
Heat the soap base in the microwave in 20 second increments until melted. Stir the soap after each heating to help prevent overheating.

Once melted, add a tiny amount of the chosen soap colorant, per manufacturer’s guidelines. Mix well to evenly incorporate the color throughout the melted soap.
Now add the fragrance oil or essential oil you’ve chosen to scent your melt and pour soaps. If using a fragrance oil, refer to manufacturer’s guidelines for skin safe usage rates. You do not want to exceed the maximum amount.
For many common essential oils, you don’t want to exceed 2.5% of the total soap weight. However, some essential oils do have lower usage rates. Therefore, you should refer to your supplier on safe usage rates in this regard as well. It’s also important to note, that not all essential oils are considered skin safe, even when diluted. (You can learn more about how to safely and confidently use essential oils via Simply Earth’s Essential Oil Hero Course.)
If you’re looking for ideas to scent your DIY gummy bear soap, Everything Pretty has some great essential oil blend recipes that smell like candy here.
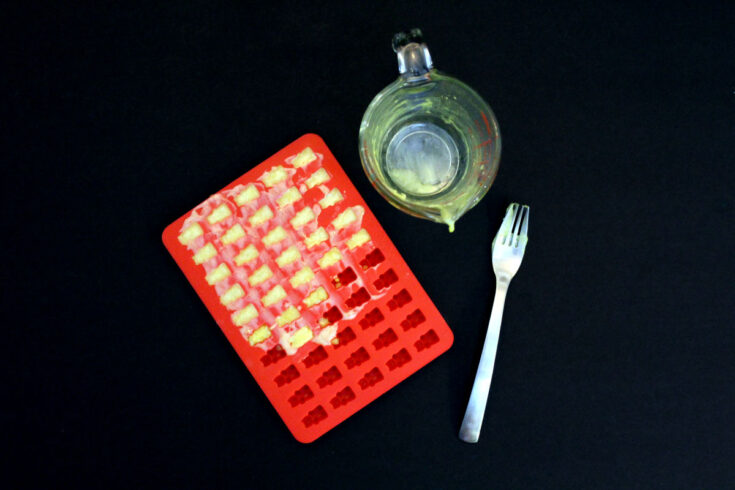
Once combined, pour the soap into the cavities of your soap mold. Then, spritz the freshly poured soap with isopropyl alcohol.
Isopropyl alcohol, or rubbing alcohol, will help to remove any air bubbles that may appear. Generally, you want to choose a rubbing alcohol with the highest percentage of alcohol you can find. However, the lower concentration will also work.
Once the soap has fully hardened, remove your soaps from the mold.
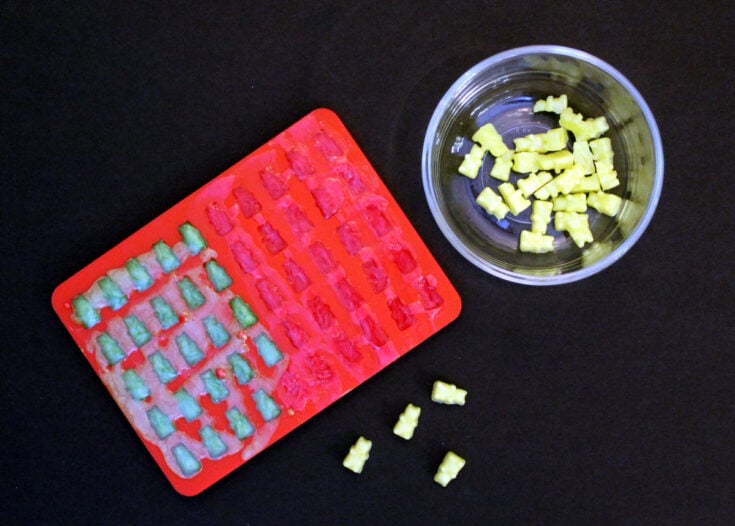
Wash out the soap mold, then repeat the previous steps for the next color of your choice.
Continue making new soap colors until you have the desired number of colors and the amount of soap you’d like to use for soap embeds.
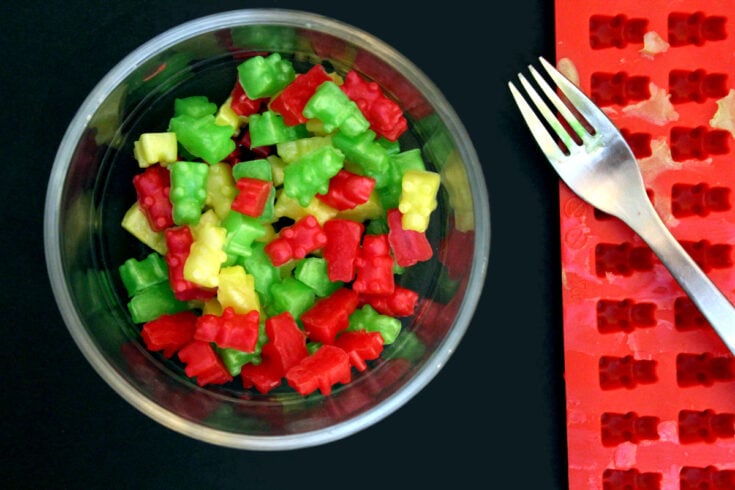
Once complete, you are ready to use your colored soaps as embeds in the melt and pour soap crafting projects of your choice. Alternately, you can also use these mini soaps as single use soaps.
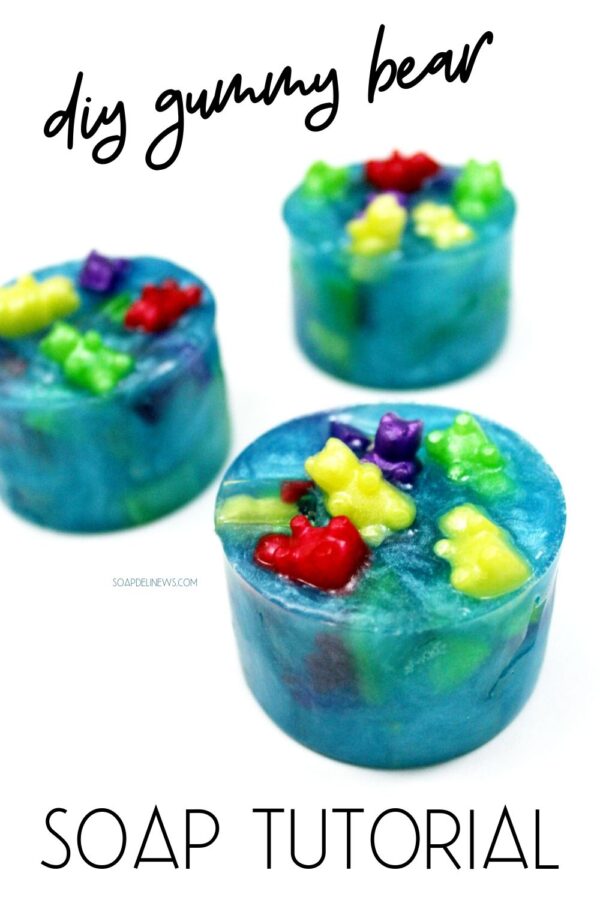
My DIY Gummy Bear Soaps
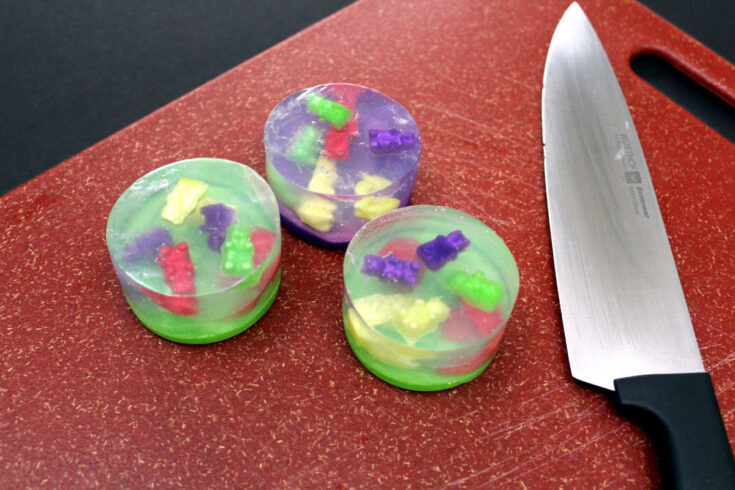
My First Attempt At Making Gummy Bear Soaps
My first attempt at making my melt and pour gummy bear soaps didn’t go so great. I made colored bottoms for these soap bars to help make the gummy bears inside pop, similar to how I created my melt and pour dandelion soap recipe. Unfortunately, as you can see from the photo, the extra clear base turned out rather cloudy.
I also couldn’t find my spray bottle filled with rubbing alcohol during my first attempt. (I found another spray bottle to fill and use for the second try.) So rather than “spray away” the air bubbles, I attempted to pop them instead. I also moved my mold too soon, before the soaps had fully hardened, and the thin film of soap that had formed on top wrinkled. To rectify this, I tried cutting the tops off my melt and pour soap bars. It sort of, but didn’t really work. So, I rebatched this attempt.

Rebatching My Soap Fail Into a Success
Luckily, rebatching melt and pour soap is super easy. And in the event your soap still doesn’t look the way you want it to, it remains functional as actual soap. So while you may not feel confident gifting your unsuccessful melt and pour soaps, you and your family can definitely use them to wash with.
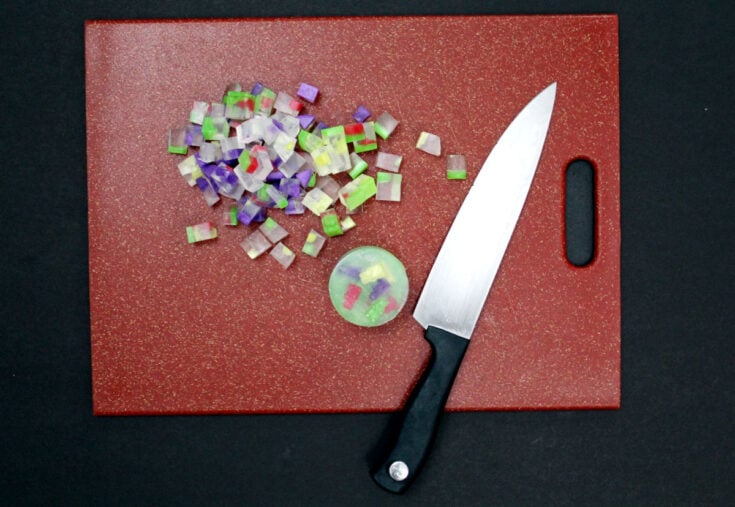
The first step I took to makeover my failed soap making attempt was to cut my soap bars into small square chunks.
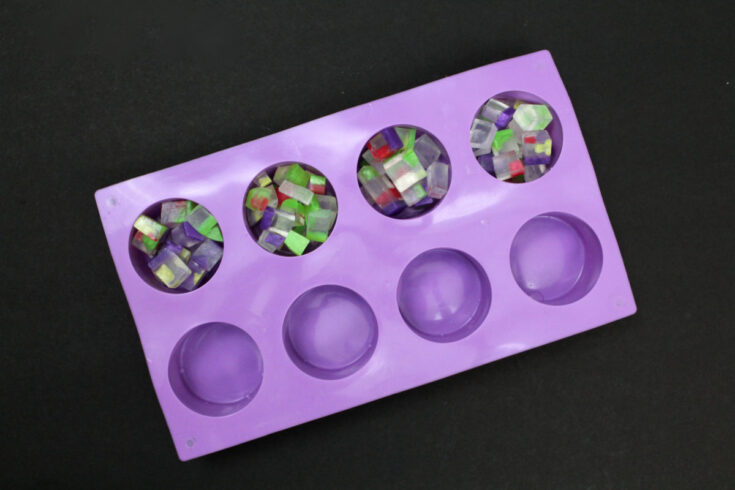
I then placed the chunks of soap into the cavities of my round silicone soap mold.
I then melted additional base in a container and added a bit of blue mica powder and scent. Once mixed, I allowed the melted glycerin soap base to cool to 120°F.
After the soap had cooled, I poured the based into the cavities of the mold with the soap chunks.

Next, I arranged a collection of various colored gummy bear soaps on top, slightly embedded into the soap with their little heads and arms sticks out. Then I spritzed them with rubbing alcohol and let them set.

After my melt and pour soaps had cooled and fully hardened, I unmolded them. I think they look like little gummy bears enjoy a swim in a pool. It’s possible it’s a drunken pool party, but that’s up to you to decide.
Once you’ve made your melt and pour soaps, be sure to wrap them tightly in foodservice film to prevent them from attracting moisture and sweating. At least until they are ready to be used! I like to use foodservice film as it sticks to itself really well and is super stretchy.

How to Create a Custom DIY Gummy Bear Soap Recipe with Any Soap Mold
Making a custom soap recipe for any shape or size silicone soap mold is easy. All you need to do is cut your melt and pour soap base of choice into chunks. Cut enough soap that you know is enough to fill at least one cavity of your mold once melted. If your soap mold has several different shaped cavities, you will want to cut enough soap to fill each one.
Once cut, combine the soap chunks in a heat safe container and microwave in 30-second increments. Stir the base after each heating. This will help the soap melt more evenly and prevent overheating, which can lead to excess air bubbles.
Now pour the melted soap based into the cavity or cavities of your soap mold. You can spray the soap with isopropyl alcohol if you like. However, as these soaps aren’t meant to be a finished product, it’s not necessary to remove air bubbles. Don’t worry if you cut and melted too much soap. All of the soap can be remelted for future projects.
Once the melt and pour soap base cools and hardens fully, remove the soap from the mold cavities. Now weigh the soap bar or bars using a digital scale. This will tell you how much soap base you will need to make a bar of soap. If you want to make multiple bars, just multiply that number by the number of soap bars you want to make.
To create soap embeds for your soap bars, you would repeat the same process.
Finally, if you want to include soap embeds in your melt and pour soap bars, you would just deduct the weight of the embeds from the weight of the soap bar to give you the amount you need. (I use a notebook to keep track of the weights needed for each cavity for all of my molds. This makes an easy reference that you can refer back to later, so you can avoid repeating this step down the road.)
The soaps you use to figure out the amount of soap you need to create a custom soap recipe for DIY gummy bear soap, or another soap adventure, can then be cut down and stored for future use. Or you can use the right away to get started on your next soap making project.
More Melt and Pour Soap Making Ideas
If you like my tutorial for making DIY gummy bear soap using a gummy bear soap mold, then be sure to check out my other melt and pour soap recipes here. You may also enjoy the melt and pour soap recipes for beginners found in the book, Easy Homemade Melt & Pour Soaps, by Jan Berry (which you can purchase here.)
For more homemade soap recipes for every skill level, be sure to follow me on your favorite social media platforms. You can find me on facebook, twitter and instagram, as well as on Pinterest and Blog Lovin‘.


4 Comments
A Life Adjacent
May 22, 2020 at 5:04 pm
Your soaps are always so original and these are one of the cutest! Love the idea of them swimming in a pool too…lol. What a super fun craft idea!
Michelle
May 25, 2020 at 11:09 am
These are the cutest soaps!! How creative!!
Christie
May 29, 2020 at 4:38 pm
These are just adorable! I love the gummy bear mold and how colourful these are. Thanks for sharing!
Rosemary
June 8, 2020 at 4:10 pm
This is the most ADORABLE idea ever! I want to get some of those gummy bear molds!
Comments are closed.