

DIY Unicorn Bubble Bars: An Easy Solid Bubble Bath Recipe
These unicorn bubble bars make bath time fun and colorful! Formulated with essential oils and moisturizing shea butter, these DIY bubble bars produce lots of foam and bubbles and release a relaxing natural fragrance. The easy tutorial shows how to make, store, and use solid bubble bath bars.
What are Bubble Bars?
Bubble bars are a fun bath time treat. I would describe bubble bars as a solid bubble bath. Bubble bars disintegrate in water and contain a foaming agent that creates mounds of foam and bubbles. Whereas bath bombs generally only fizz and don’t produce much foam.
Keep reading to discover how to make bubble bar dough to create pampering, unicorn bath treats that are perfect for Lush lovers in need of self care.
Ingredients for Bubble Bars
You probably already have most of the ingredients for my solid bubble bath recipe. Here’s what goes into them:
- Baking Soda and Citric Acid – Baking soda and citric acid are responsible for the fizzing reaction and make the bulk of this bubble bar recipe.
- SLSA (Sodium Lauryl Sulfoacetate) – SLSA is a natural detergent, derived from coconut and palm oils, and acts as the foaming agent. Unlike SLS, SLSA has a large particle size and can’t penetrate the skin. The ingredient is considered a mild, skin-friendly cleanser, unlikely to cause irritation.
- Shea Butter – Shea butter holds the bubble bar mixture together. The plant butter also is also deeply moisturizing and will make your skin feel soft and nourished.
- Emulsifier – We also need to add an emulsifier to disperse the shea butter, essential oils, and colorant in the bathwater. Without an emulsifier, the oils will pool on the water surface, and the mica powder will leave a ring on the tub. I used Polysorbate 80, which is readily available and works well in this homemade bath product.
- Essential Oils (optional) – Essential oils provide a natural fragrance. You can find a few blends below.
- Mica (optional) – To create a tie-dye effect, I used pink and blue mica to tint portions of the bubble bar. Of course, you can choose other hues or omit the colorant. Alternately you can also make rainbow bar embeds for your DIY bubble bars.
- Biodegradable Glitter (optional) – Biodegradable glitter makes this bubble bar recipe shine and sparkle.

Essential Oil Blends for Unicorn Bubble Bars
You can add up to 100 drops essential oils to this easy solid bubble bath recipe. Need some inspiration? Try one of these fun essential oil blends (all are safe for kids):
- Glitter Pony: 50 drops lavender + 35 drops vanilla oleoresin + 20 drops sweet orange
- Stardust: 45 drops citronella + 20 drops blue cypress
- Rainbow Cloud: 45 drops spearmint + 30 drops lavender + 18 drops steam-distilled lemon
Equipment Needed to Make Solid Bubble Bath
To make these DIY bubble bars, assemble the following equipment and tools:
- Mouth Cover – SLSA is a fine, airborne powder that can irritate the airways. For this reason, cover your mouth and nose with a face mask or another form of protective covering.
- Nitrile Gloves – Raw citric acid can be stinging and damage nail polish, so I recommend putting on nitrile gloves to protect your hands.
- Mixing Bowl and Measuring Cup – A large glass mixing bowl and heat-proof glass measuring cup are best to melting and mixing the ingredients.
- Spatula – A spatula or spoon is perfect for mixing the bubble bar mixture.
- Cookie Cutter – My easy method for making bubble bars at home uses cookie cutters to form the bubble bars. I opted for cute unicorn cutters. Of course, you can pick whatever shape you like. It’s also a good idea to mix different shapes and sizes to create an interesting variety of bubble bars.

How to Make Bubble Bars
Now that we have gathered our supplies and tools, it’s time to make bubble bars! Don’t be intimidated by the process. Making bubble bars at home is easier than you think, and I’m here to explain every step to create the perfect unicorn bubble bars.
Melt Shea Butter
The first step is to melt the shea butter. You can either melt the shea butter in a water bath or in the microwave. Here is what you do:
- Water Bath: Fill a small saucepan or double boiler 1 in with water and bring to a gentle simmer. Place the shea butter in a heat-proof container (I used a large glass measuring cup) and heat in the water bath until melted.
- Microwave: Place the shea butter into a microwave-safe dish. Heat on medium for 30 seconds. Take out and stir. Continue this process until the shea butter has completely melted.
Be careful when handling melted shea butter because it can be quite hot.
Add the Essential Oils and Emulsifier
Let the shea butter cool on the counter for 10 minutes. Then add in the essential oils and emulsifier. Give the mixture a good stir to ensure that the liquids are well combined.

Mix Dry Ingredients
First, put on a face mask and gloves. Add the baking soda, citric acid, SLSA, and glitter into a large glass mixing bowl. Stir to combine.
Tip: If the baking soda and citric acid are lumpy, sift them first.
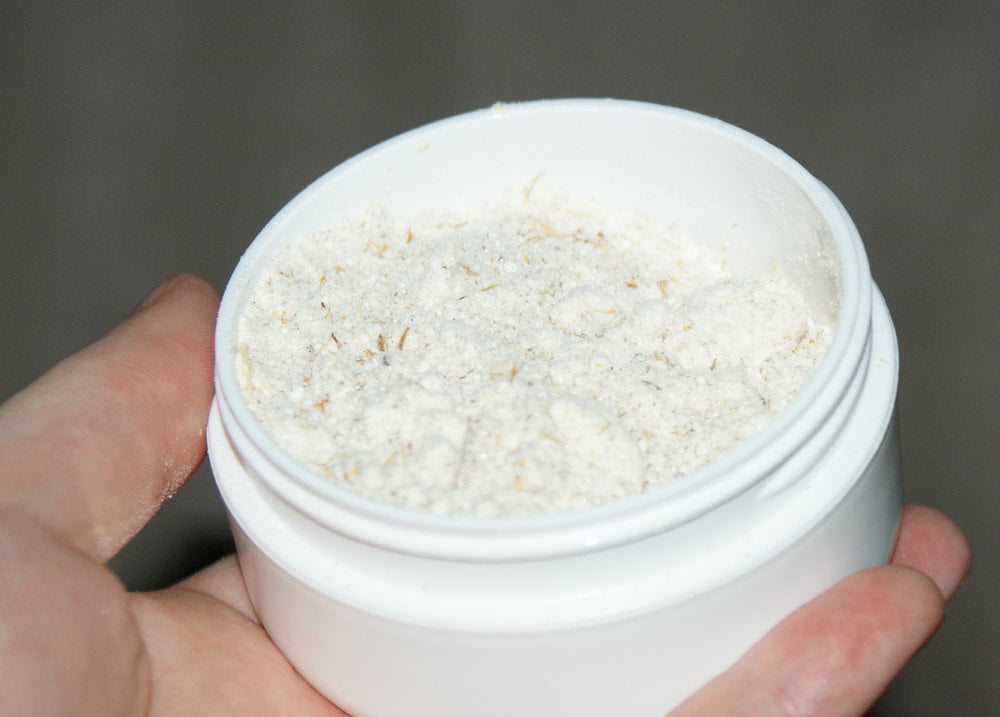
Make Bubble Bar Mixture
To make the bubble bar mixture, pour the melted shea butter over the dry ingredients. Stir until the mixture starts clumping together. Then continue to knead with your hands until it resembles the texture of cookie dough, and no lumps remain.
At this point, feel free to take off your facemask. The SLSA is now bound, and there’s no risk of inhaling the tiny particles.

Color the Mixture
To make unicorn bubble bars like you see in the pictures, cut the bubble bar mixture into half, and then cut one half into quarters. Tint one quarter portion pink and the other quarter portion blue. The half portion remains white.

Flatten The Bubble Bar Dough
Work on a clean, flat, non-stick surface (I used my kitchen countertops), mix the colors, and flatten the bubble bar dough with your hands. Form a disk that’s about 1/2 inch thick.

Cut Out Bubble Bar Shapes
Using cookie cutters, cut out your bubble bars. Since the bubble bar dough is still soft at this point, avoid lifting the bars. Instead, cut out shapes near the edge and then pull the cookie cutter away from the center. Remove any excess dough and then lift the cutter to release your bubble bar.
Optionally, sprinkle the bubble bar dough with glitter before cutting out shapes.
Continue this process with the scraps until all of the dough for your unicorn bubble bars is used up.
Dry the Solid Bubble Bath Bars
Leave the bubble bars to dry for several hours or overnight, and you’re all done. Typically, bubble bars take between 48 and 72 hours to dry. However, as these bars are thinner than most solid bubble bath bars, they may be ready in as little as 6 hours.
However, if your bubble bars aren’t fully dry after 48 hours, simply give them additional time, as humidity and other conditions can affect drying time.
Once your solid bubble bath bars are dry, they will be hard to touch, and ready to use.

How to Use Bubble Bars
There are several ways to use bubble bars:
- Fill the bathtub with warm water and drop one bubble bar in. The bubble bar will fizz and dissolve. You can help the process by swirling it around.
- You can also crumble the bars under the running tap while the bath fills up.
- Regardless of which method you choose to dissolve your bubble bars, be sure to swish and twirl the water with your hands to create more foam and bubbles.

Tips for Gift Giving and Packaging Ideas
Unicorn bubble bars are adorable homemade gift ideas. They are sweet presents for kids, Galentine’s, or thank-you favors for a baby shower, bridal shower or birthday.
For gift wrapping, package the bubble bars in favor bags and decorate each bag with colorful ribbons or twine. I found the cutest unicorn gift tags on Etsy that go perfectly with these DIY bubble bars:
- Editable Unicorn Favor Tags
- Thank-You Unicorn Favor Tags
- Pastel Unicorn Tags
- Aquarelle Unicorn Gift Tags
Storage and Shelf Life
Store the bubble bars in an airtight and waterproof storage container in a dry, cool place. I keep mine in a Tupperware box, but Ziplock bags or large mason jars would work, too.
I don’t store my bubble bars in the bathroom as the moisture in the air (e.g. steams from the shower) can cause them to dissolve. Wrap them tightly in plastic wrap for extra protection.
Although all ingredients have a long shelf life, citric acid loses its potency over time. I recommend using your DIY bubble bars within 6 months.
Learn how to make DIY unicorn bubble bars for bath time fun! This easy solid bubble bath tutorial instructs you on how to make solid bubble bath bars for a pampering bath treat. Be careful when handling melted shea butter because it can be quite hot. If the baking soda and citric acid are lumpy, sift them before mixing with the other ingredients. Once you've mixed the SLSA into the wet ingredients to form the bubble bar dough, feel free to take off your facemask. The SLSA is now bound, and there's no risk of inhaling the tiny particles.DIY Unicorn Bubble Bars

Materials
Tools
Instructions
Notes

If you like my DIY unicorn bubble bars, then be sure to try my recipe for making poop emoji bubble bars. Kids absolutely love this solid bubble bath. Inspired by the pile of poo emoji, this bubble bar mimics the brown soft-serve ice cream shaped icon with a smile.

More Unicorn Beauty Products
If you enjoyed this unicorn bubble bar recipe, you might like some of my other unicorn-themed beauty and craft projects, too:
- Unicorn Body Balm Recipe
- Magical Unicorn Glitter Butter
- DIY Unicorn Body Glitter
- DIY Unicorn Eyeshadow Trio
- Glittery Galaxy Unicorn Soap
- Unicorn Macaron Soap Recipe
- Unicorn Style Wax Air Fresheners
- DIY Unicorn Night Lights
Discover more DIY beauty products you can make at home by following Soap Deli News on Facebook, Twitter, Pinterest, Instagram . Or subscribe to my newsletter for more beauty tips and ideas.


20 Comments
Cari
January 6, 2021 at 5:53 pm
These are adorable! Thanks for another amazing recipe!
Rebecca D. Dillon
January 7, 2021 at 1:33 pm
Thanks so much!
Kirsten
May 24, 2022 at 9:10 pm
I am loving your recipes! my daughter loves unicorns so theses and the bath bombs with whipped topping are a big hit! Question – I see some stars in a few pictures with the unicorn bubble bars , and the stars have tiny star cutouts, do they sell mini cookie cutters to create little holes like that??? sooo intriqued!! I hope you still read this. I was actually wondering how to do that for a clay project – its not like i can stick clay in my little paper hole cutter, hehe! If you could share, I would highly appreciate it! Thanks so much!
Rebecca D. Dillon
May 26, 2022 at 1:22 pm
Yes, you can find tiny cookie cutters for polymer clay. They are called micro clay cutters. Here is a star one: https://tidd.ly/38KjkyV
Rashmita chandnani
January 8, 2021 at 12:25 am
The recipe is so easy and amazing
Rebecca D. Dillon
January 8, 2021 at 10:34 am
So glad you like it!
Sara
January 20, 2021 at 1:53 pm
This recipe as written didn’t give me cookie dough consistency, I had to add a lot more dry ingredients, not sure why. They are hardening up tho so hopefully they turn out ok!
Rebecca D. Dillon
January 21, 2021 at 5:04 pm
It could be the shea butter was too warm and just needed additional time to cool. Something as simple as room temperature could affect this. Also shea butter tends to have a range of melting points especially with refined vs unrefined that may require some minro tweaks, as natural products are never entirely consistent. A high melt point point refined shea butter is best but other types should work as well.
Ty
April 23, 2021 at 3:53 pm
Hi, made these last night & still soft. I have them stored in an air tight box- will they dry in there
Rebecca D. Dillon
April 27, 2021 at 1:44 pm
I’d wait until they dry before storing them.
waheda
February 19, 2021 at 10:54 am
It looks super cute.
Can i use 1/4 cup slsa in place of 1/2 cup.?
will it make a diffcwhike binding the mix.
Thank you.
Rebecca D. Dillon
February 19, 2021 at 11:46 am
You can reduce the SLSA. However, you’ll need to proportionally increase the other dry ingredients to make up for the difference, or reduce the amount of shea butter you use.
Christina Thompson
March 19, 2021 at 11:05 am
Can you replace Shea butter with coconut oil or cocoa butter?
Rebecca D. Dillon
March 19, 2021 at 11:54 am
Both of these have very different melt points than shea butter. Coconut oil has a melt point that’s likely to low to be used solo, however, it may be possible to use cocoa butter, though you may need to add another ingredient to lower the melt point. It would require some experimentation however as you wouldn’t be able to make a straight swap for the shea butter.
Liz
June 19, 2022 at 12:22 am
hi – this looks interesting and i would love to try it – can this mix also be used to roll up in the multi coloured swiss roll type similar to a log
thanks
Rebecca D. Dillon
June 19, 2022 at 1:48 pm
I don’t see why not.
Liz
June 23, 2022 at 10:01 pm
hi
just made these – what a mission but i got there – now the question i have is – 150 grams shea butter – it turned the baking soda and citric acid to a sloppy mess – so ended up doubling the baking soda and citric acid – should i have doubled the essential oils and slsa as well – once i added the extra baking soda and citric acid it worked well – i will keep playing with the mix because the unicorns are awesome – i also found if i lay cling film/glad wrap over the mix then used the cutter they came out so much nicer and kept their shapes better
thanks for an awesome idea
Rebecca D. Dillon
July 1, 2022 at 11:56 am
It sounds like the shea butter was too hot. If it’s warm in your area/home, I would just soften the shea butter so it’s like room temperature butter. I think the recipe you ended up with should be fine. Thanks for the tip with the cling wrap and cookie cutters!
Liz
July 7, 2022 at 9:27 pm
thank you so much for replying to me – what would be a good temperature for the shea butter before adding to the dry ingredients?? – i really want to try again – should i cool it right down to the point of nearly sort of re-setting?? – the kids loved them and their foaming action was awesome
Rebecca D. Dillon
July 9, 2022 at 9:41 am
You want it soft enough to mix but not hot liquid. Therefore, yes. If you’re having issues with it foaming early, I’d let it cool to the point it just starts to look opaque and is no longer fully translucent.
Comments are closed.